This topic describes how to connect to Amazon Simple Storage Service (S3) from Domino. You must have network connectivity between S3 and your Domino deployment.
The easiest way to connect to an Amazon S3 instance from Domino is to create a Domino Data Source as described below.
|
Note
| Administrators can create a Data Source for tabular S3 with AWS Glue. See the Admin Guide for details. |
-
From the navigation pane, click Data.
-
Click Create a Data Source.
-
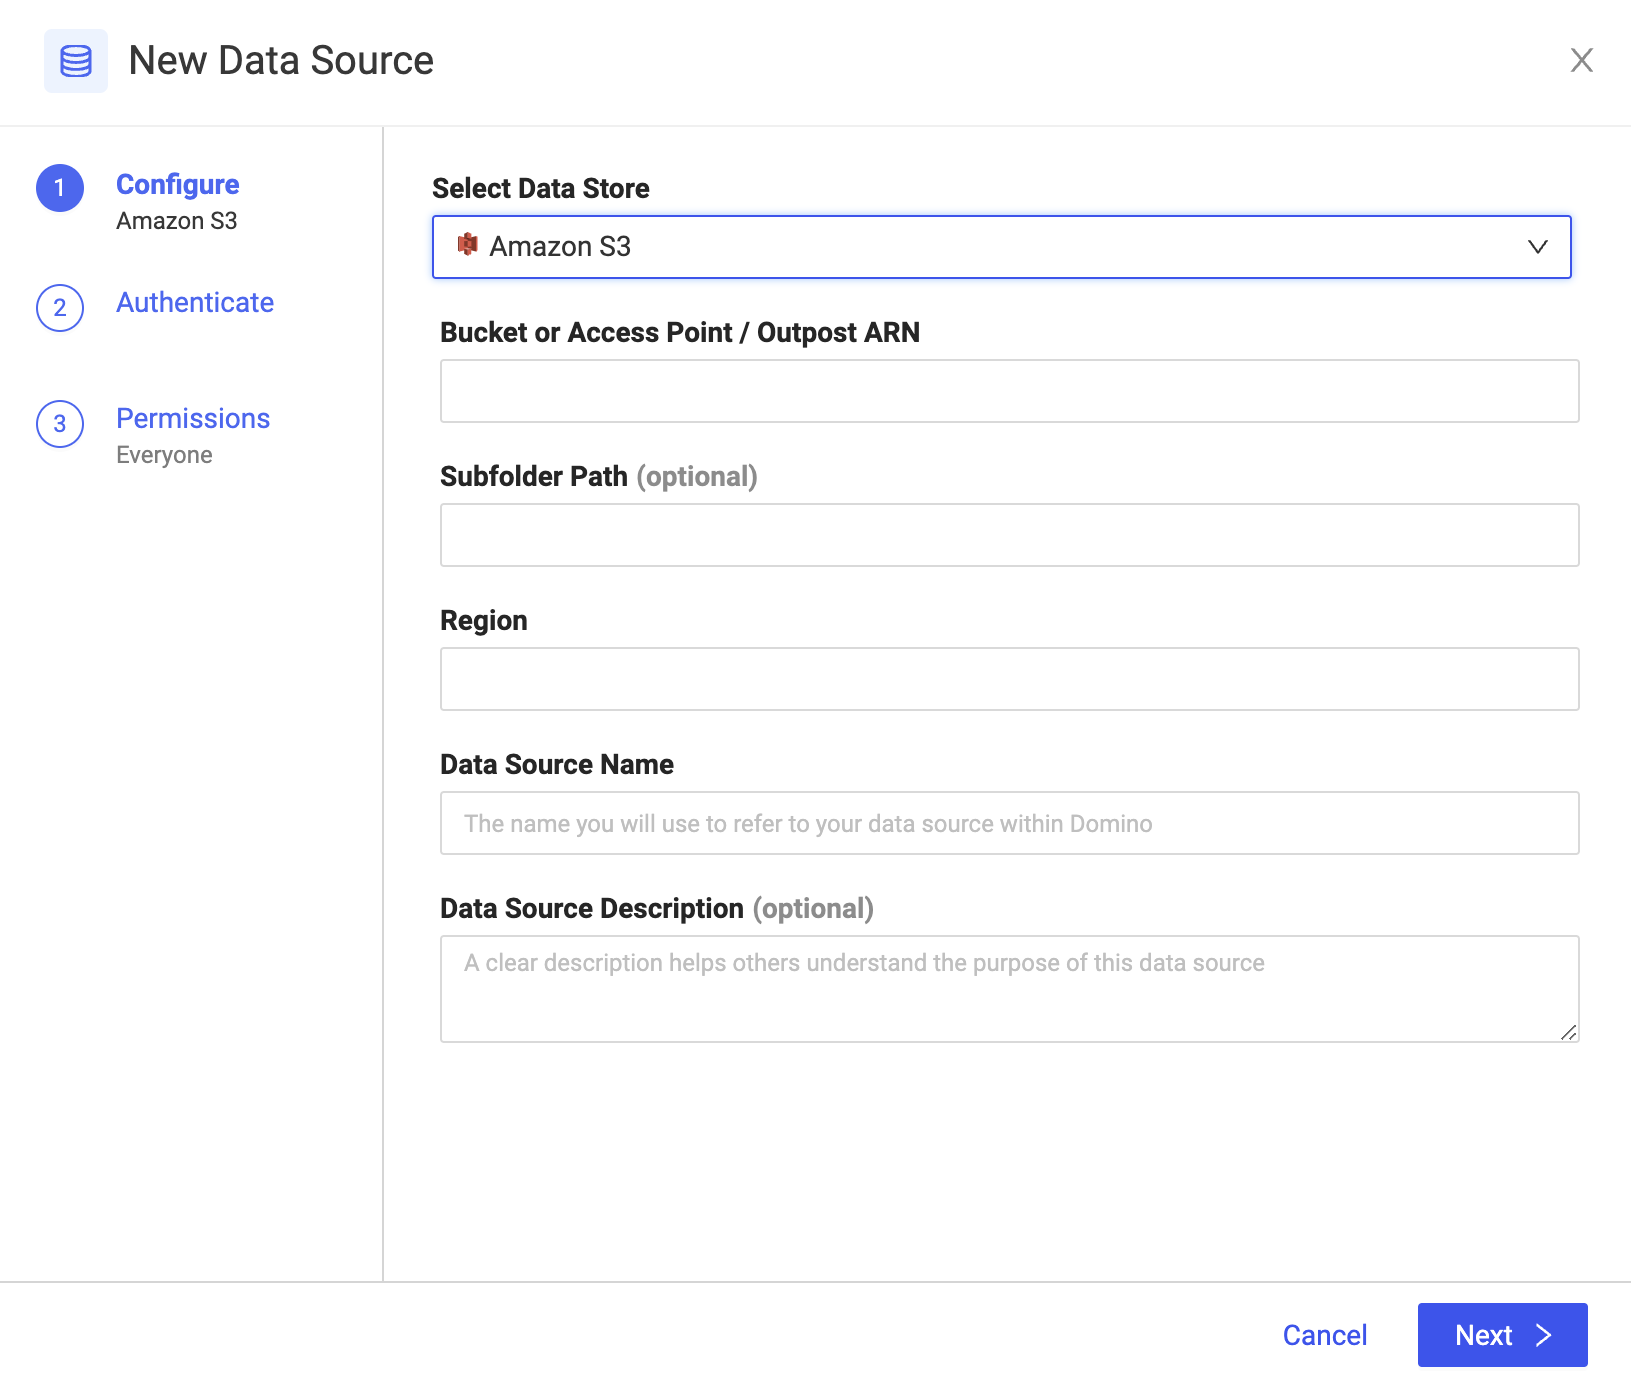
In the New Data Source window, from Select Data Store, select Amazon S3.
-
Enter the Bucket.
-
Optional: Enter a Subfolder Path, such as
myFolderordata/tests, to restrict the Data Source to only list data from and write to the specified folder. -
Enter the Region.
-
Enter the Data Source Name.
-
Optional: Enter a Description to explain the purpose of the Data Source to others.
-
Click Next.
-
Enter the credentials to authenticate to S3.
By default, Domino supports basic authentication; the Domino secret store backed by HashiCorp Vault securely stores the credentials. If your administrator enabled it, IAM credential propagation might be available.
NoteIAM-authenticated connections can be used only to execute jobs and workspaces. Other execution types, such as scheduled jobs and Model APIs, require basic authentication. -
Click Test Credentials.
-
If the Data Source authenticates, click Next.
-
Select who can view and use the Data Source in projects.
-
Click Finish Setup.
|
Warning
| This section describes an alternate method to connect to the Amazon S3 Data Source. Domino does not officially support this method. |
Use one of the following methods to authenticate with S3 from Domino.
Both follow the common naming convention of environment variables for AWS packages so you don’t have to explicitly reference credentials in your code.
-
Use a short-lived credential file obtained through Domino’s AWS Credential Propagation feature.
After your administrator configures this feature, Domino automatically populates any Run or Job with your AWS credentials file. These credentials will be periodically refreshed throughout the Workspace duration to ensure they don’t expire.
Following common AWS conventions, you will see an environment variable
AWS_SHARED_CREDENTIALS_FILEwhich contains the location of your credential files which will be stored at/var/lib/domino/home/.aws/credentials.Learn more about using a credential file with the AWS SDK.
-
Store your AWS access keys securely as environment variables.
To connect to the S3 buckets to which your AWS account has access, enter your AWS Access Key and AWS Secret Key to the AWS CLI. By default, AWS utilities look for these in your environment variables.
Set the following as Domino environment variables on your user account:
-
AWS_ACCESS_KEY_ID -
AWS_SECRET_ACCESS_KEY
See Secure Credential Storage to learn more about Domino environment variables.
-
Get a file from an S3-hosted public path
-
If you have files in S3 that are set to allow public read access, use Wget from the OS shell of a Domino executor to fetch the files. The request for those files will look similar to the following:
wget https://s3-<region>.amazonaws.com/<bucket-name>/<filename>This method is simple but doesn’t require authentication or authorization. Do not use this method with sensitive data.
AWS CLI
-
Use the AWS CLI for a secure method to read S3 from the OS shell of a Domino executor. Making the AWS CLI work from your executor, install it in your environment and enter your credentials.
-
Get the AWS CLI as a Python package from pip.
-
Use the following Dockerfile instruction to install the CLI and automatically add it to your system PATH. You must have pip installed.
USER root RUN pip install awscli --upgrade USER ubuntu -
After your Domino environment and credentials are set up, fetch the contents of an S3 bucket to your current directory by running:
aws s3 sync s3://<bucket-name> . -
If you are using an AWS credential file with multiple profiles, you might need to specify the profile. (The
defaultprofile is used if none is specified.)aws s3 sync s3://<bucket-name> . --profile <profile name>See the official AWS CLI documentation on S3 for more commands and options.
Python and boto3
-
To interact with AWS services from Python, Domino recommends boto3.
-
If you’re using a Domino Standard Environment, boto3 will already be installed. If you want to add boto3 to an environment, use the following Dockerfile instructions.
This instruction assumes you already have pip installed.
USER root RUN pip install boto3 USER ubuntu -
To interact with S3 from boto3, see the official boto3 documentation. The following is an example of downloading a file where:
-
You have set up your credentials as instructed above
-
Your account has access to an S3 bucket named
my_bucket -
The bucket contains an object named
some_data.csvimport boto3 import io import pandas as pd # Create a new S3 client client = boto3.client('s3') # Download some_data.csv from my_bucket and write to ./some_data.csv locally file = client.download_file('my_bucket', 'some_data.csv', './some_data.csv')Alternatively, for users using a credential file, use the following code:
import boto3

# Specify your profile if your credential file contains multiple profiles
session = boto3.Session(profile_name='<profile name>')

# Specify your bucket name
users_bucket = session.resource('s3').Bucket('my_bucket')

# 'list' bucket should succeed
for obj in users_bucket.objects.all():
   print(obj.key)

# Download a file
users_bucket.download_file('some_data.csv', './some_data.csv')
This code does not provide credentials as arguments to the client constructor, since it assumes:
-
Credentials will be automatically populated at
/var/lib/domino/home/.aws/credentialsas specified in the environment variableAWS_SHARED_CREDENTIALS_FILE -
You have already set up credentials in the
AWS_ACCESS_KEY_IDandAWS_SECRET_ACCESS_KEYenvironment variables.
-
After running the previous code, a local copy of some_data.csv exists in the same directory as your Python script or notebook. You can load the data into a pandas dataframe.
df = pd.read_csv('some_data.csv')See Get your files and data in the Get Started with Python tutorial for a more detailed example of working with CSV data in Python.
R and aws.s3
-
To connect to S3 from R, Domino recommends the cloudyr project’s package called aws.s3.
-
If you’re using a Domino Standard Environment, aws.s3 will already be installed. To add aws.s3 to an environment, use the following Dockerfile instructions.
USER root RUN R -e 'install.packages(c("httr","xml2"), repos="https://cran.r-project.org")' RUN R -e 'install.packages("aws.s3", repos = c("cloudyr" = "http://cloudyr.github.io/drat"))' USER ubuntu -
For basic instructions about using aws.s3 see the package README. The following is an example of downloading a file where:
-
You have set up the environment variables with credentials for your AWS account
-
Your account has access to an S3 bucket named
my_bucket -
The bucket contains an object named
some_data.csv
# Load the package library("aws.s3") # If you are using a credential file with multiple profiles. Otherwise, this can be excluded. Sys.setenv("AWS_PROFILE" = "<AWS profile>") # Download some_data.csv from my_bucket and write to ./some_data.csv locally save_object("some_data.csv", file = "./some_data.csv", bucket = "my_bucket") -
-
After running the previous code, a local copy of some_data.csv exists in the same directory as your R script or notebook. Read from that local file to work with the data it contains.
myData <- read.csv(file="./some_data.csv", header=TRUE, sep=",")
View(myData)
-
After connecting to your Data Source, learn how to Use Data Sources.
-
Share this Data Source with your collaborators.