When a project is ready to be promoted to production, you might want to continue experimenting with the model even after the project is deemed production-grade. When that happens, you must make sure that others with access to the project do not make changes to the production version without careful consideration.
To do this, use the organizations feature. If an organization does not exist, create an organization that contains production-ready projects and projects in production only. Transfer ownership of your production-grade project to this organization before you begin experimenting.
|
Note
| All Domino users with access to this organization must understand its purpose. |
To experiment on this project, fork it into a new project and conduct your experiments there.
When you are ready to merge your changes back into the original, production-grade project, click Request Review to submit a merge request to the project owner.
|
Note
| See forking and merging before using this feature. |
Some Domino customers do this for models that are not in production, as a way of submitting their work to their managers.
While changing organizational ownership of a project is usually the simplest way to promote a project, Domino offers other methods.
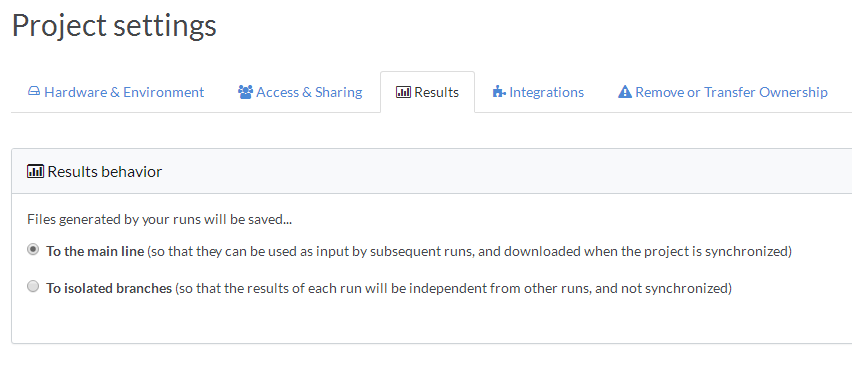
Change results behavior
You can save runs to isolated branches rather than the main branch. This ensures that the results of each run is independent and not synchronized. One user’s run has no impact on the next user’s run.
To change results behavior:
-
In the navigation pane, click Settings.
-
In Project Settings, click the Results tab.
-
Under Results behavior, select To isolated branches.
Export the project
You can use Imports/Exports to export files from your production-designated project into a separate working project. The code in the original project becomes read-only, while code execution occurs in the working project.
Promote a project to production
-
In the navigation pane, click Imports/Exports.
-
Under Exports, select Files. This ensures that any project that imports this one uses the current set of files for your production-designated project.
-
Create and name a new project, and then import the files from your original, production-designated project. This new project is your working project.
-
Assign the "release" tag to runs that you want to make available to users in the working project. Now, they can select the correct version of the production-ready project.

Project tagging
You can use Domino’s Project Tagging to designate a project as being production-ready. This option is only available for on-premises or private deployments.
Tag a project as production-ready
-
In the navigation pane, click Overview.
-
In Select Tags, begin typing the tag (
prodorpromote, for example).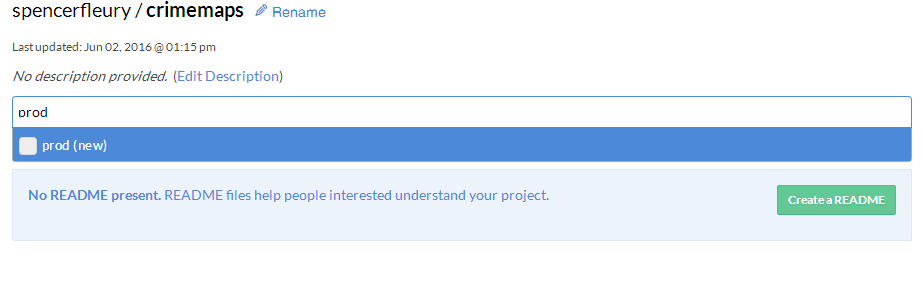
If the tag has already been used, Domino prompts you with an autofill option. Otherwise, you can add a new tag.
After the project is tagged, make sure all users with access to the project understand the tag’s meaning.
Promote-to-production workflow
You can use Domino’s advanced routing option to test with one version of a model and manage production traffic on another version.
See Route Your Model for more information.