Domino Workspaces function as a server. You can use your preferred tools in a reproducible and customizable Environment.
-
In your Project’s navigation pane, click Workspaces.
-
Click + Create New Workspace.
-
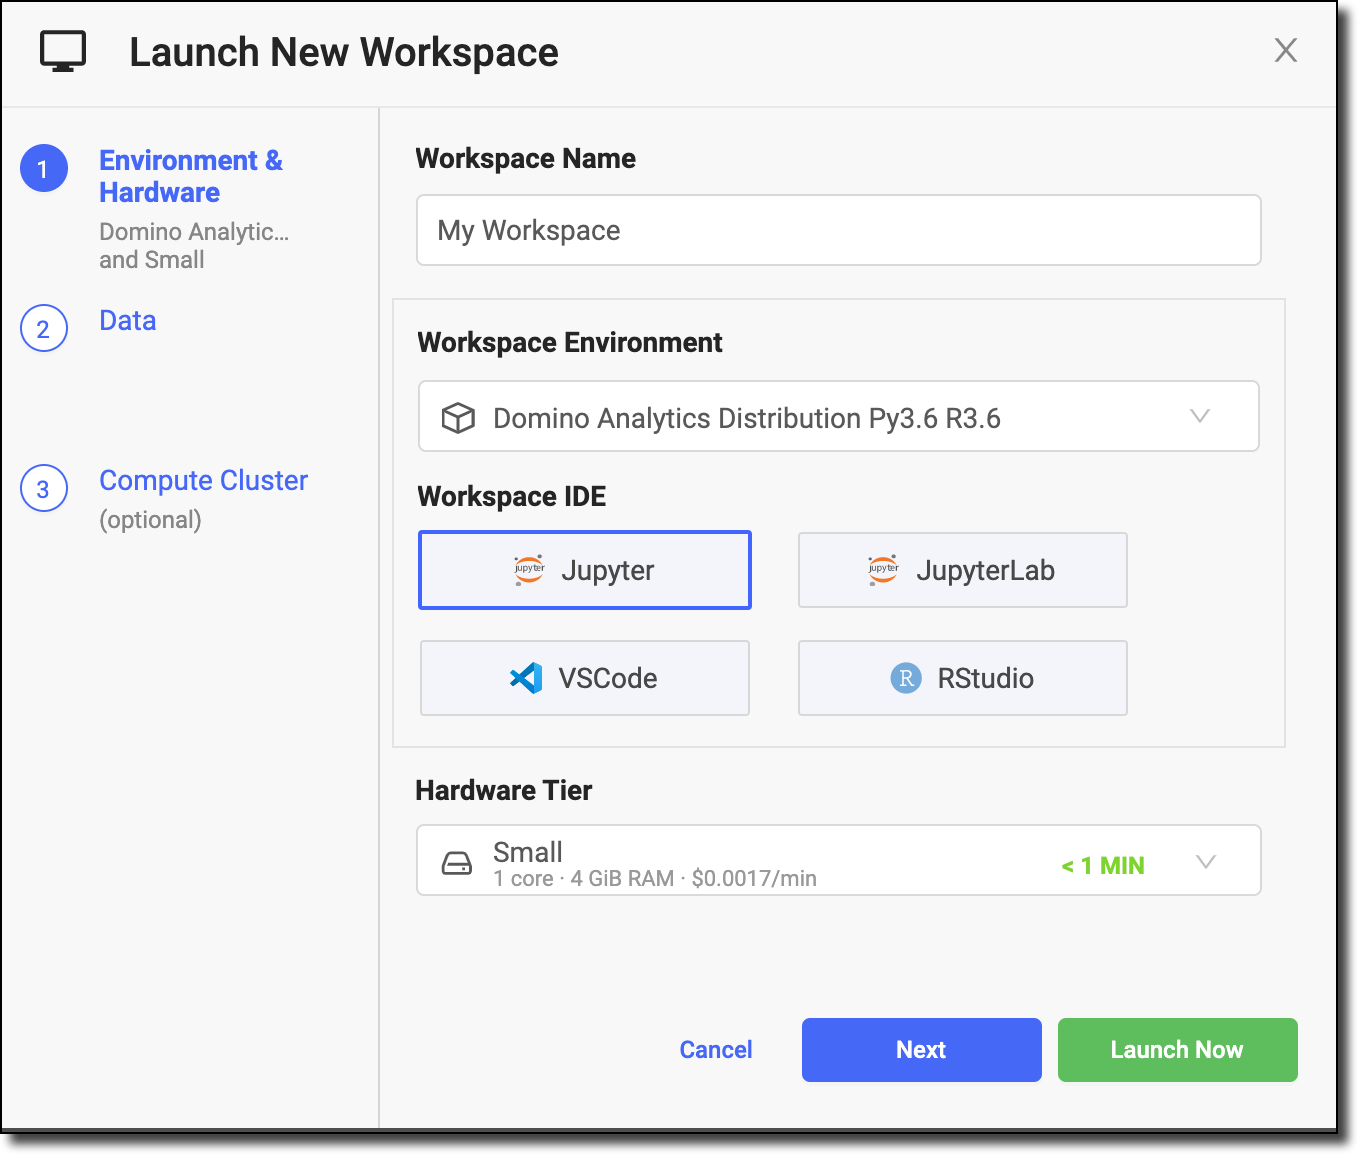
Enter a name for your Workspace.
-
Select an Environment for your Workspace. You can click one of Domino’s pre-defined Environments, or create a custom Environment. See Customize Environments to learn more about managing Environments.
-
Select the integrated development environment (IDE) that you’ll use in your Workspace (such as Jupyter). The selected Environment determines the available IDEs. See Add Workspace IDEs to learn how to manage IDEs.
-
Select a Hardware tier.
A hardware tier represents the compute hardware — CPU, memory, and other resources like GPUs — used for your Run. It can be a virtual instance in a cloud services provider, or a physical machine running in your deployment’s on-premise data center. Workspace scheduling requires a server with adequate free resources; otherwise, the Workspace queues until resources free up or a new server is available. Selecting a smaller hardware tier can speed up provisioning. Opt for the smallest tier that fulfills your task’s needs.
-
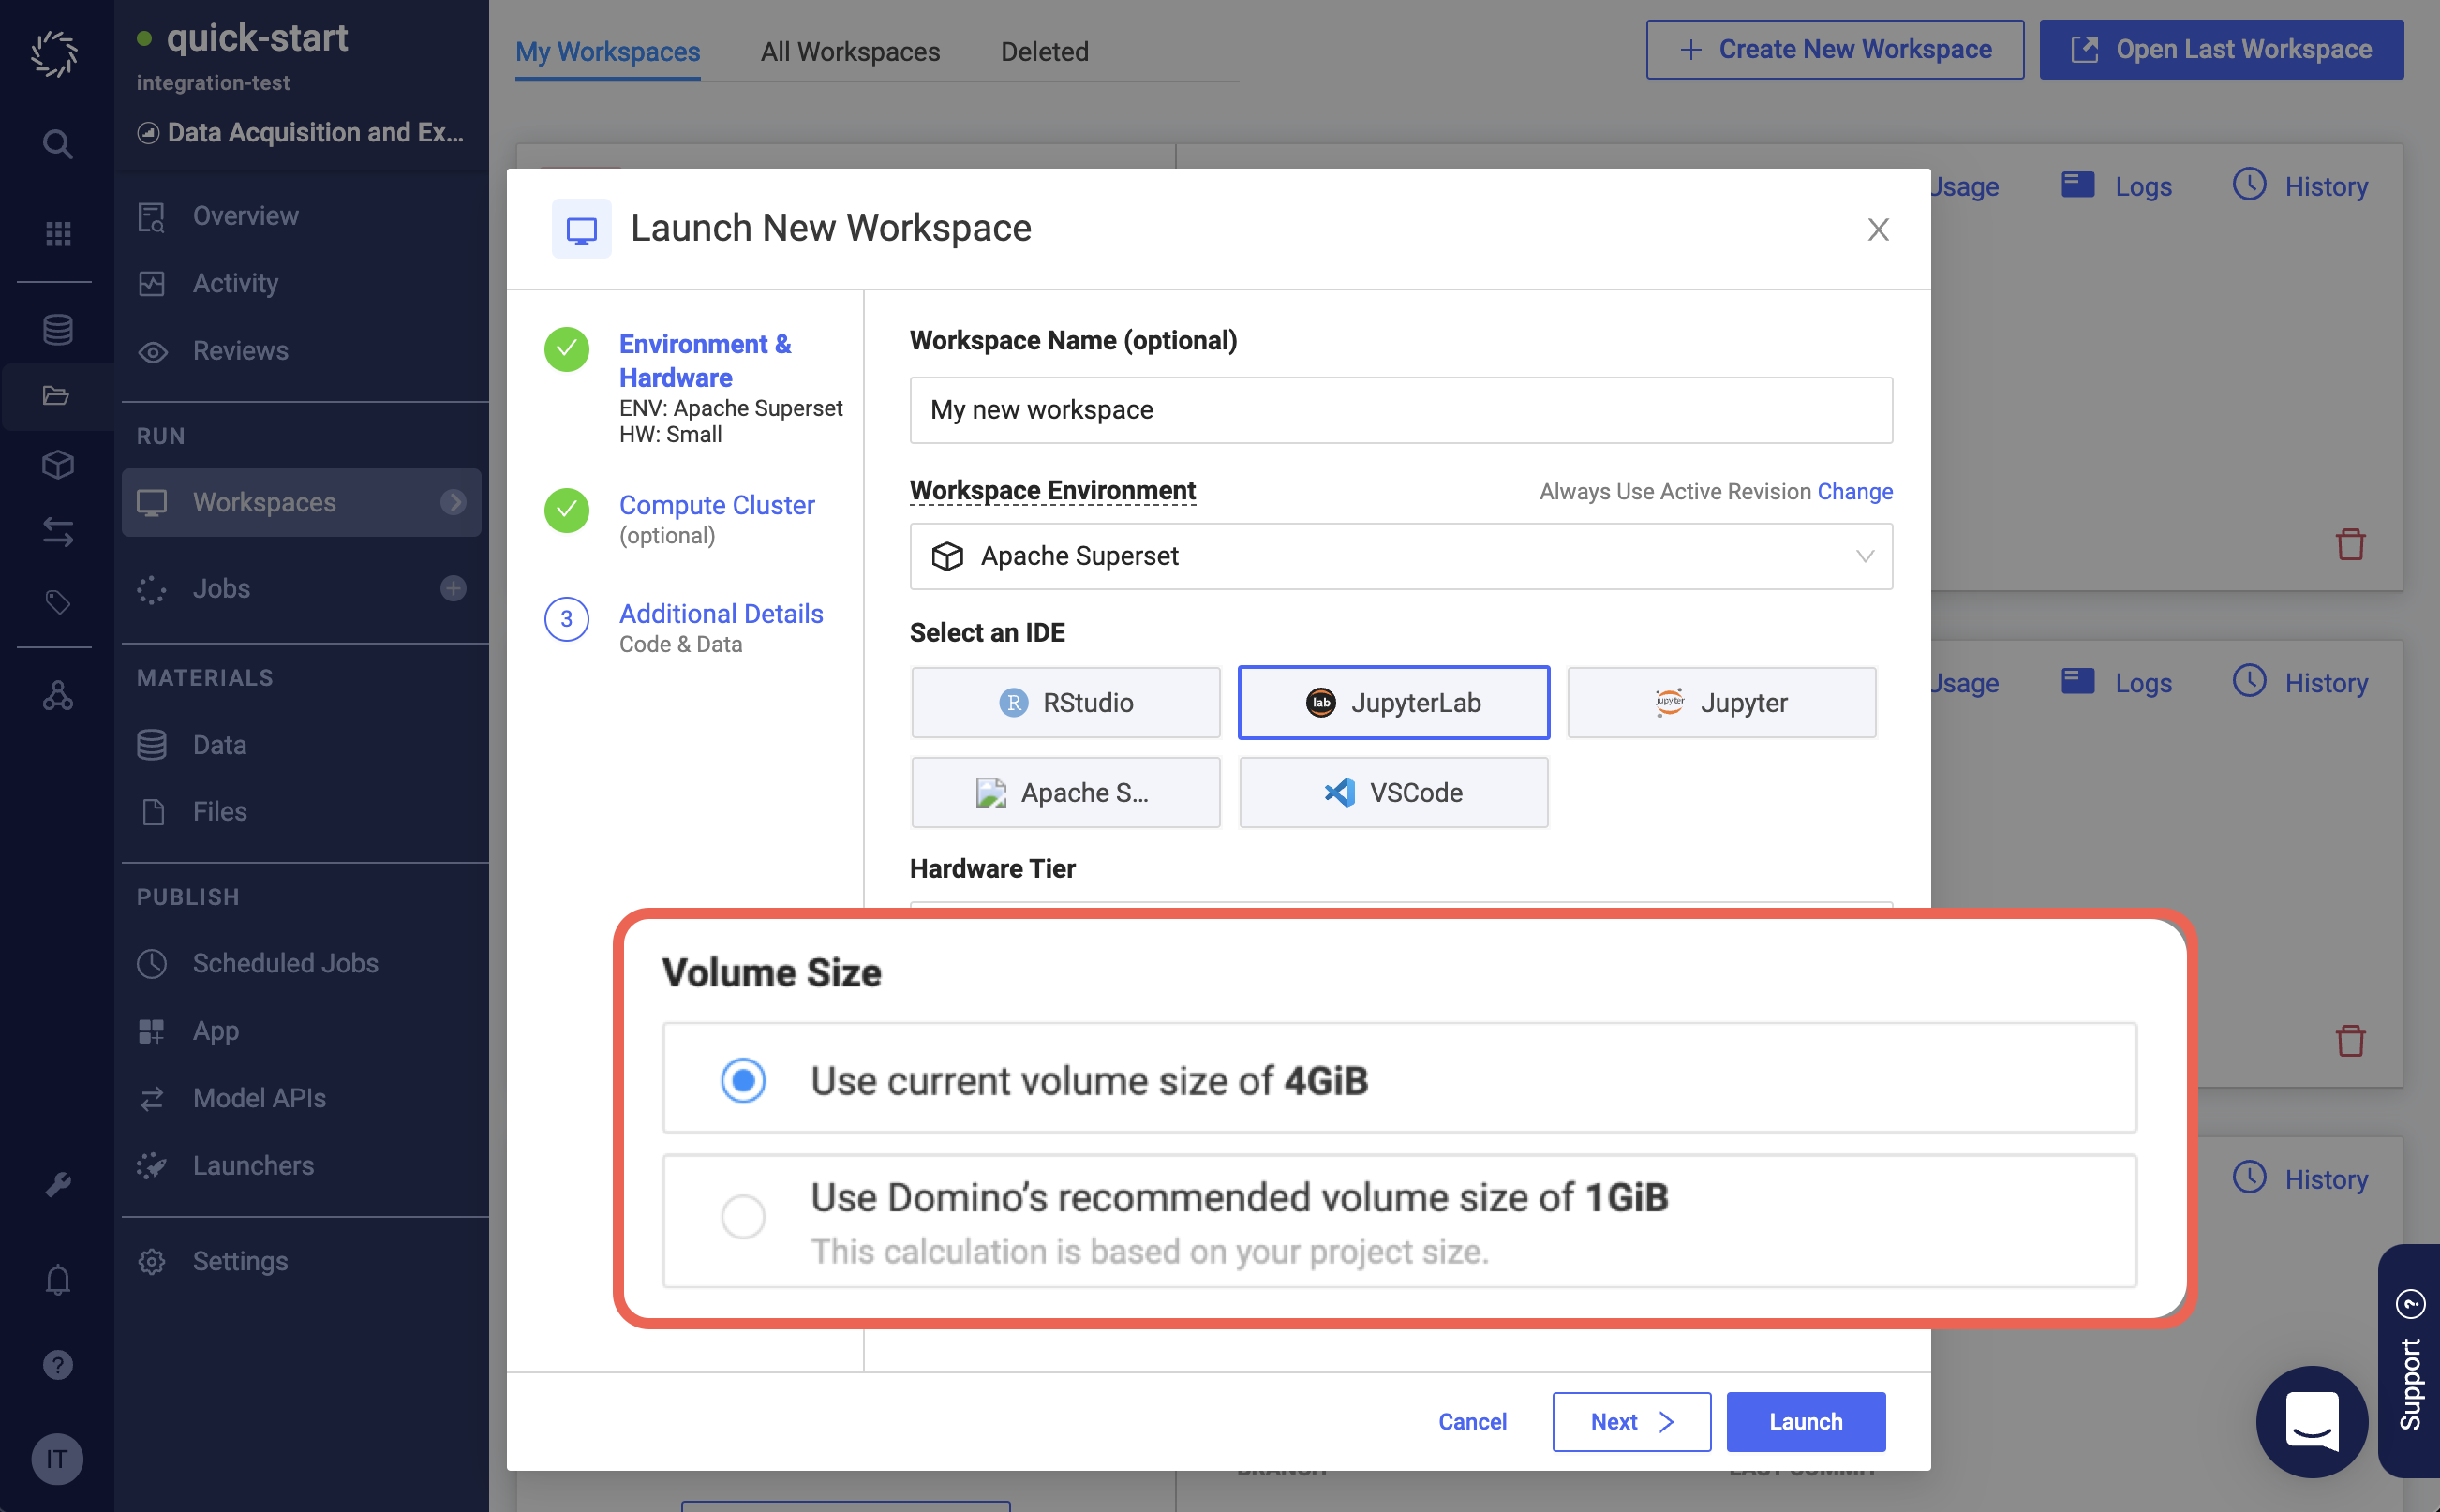
If your administrator has enabled volume provisioning recommendations, you can select a Volume Size recommended by Domino based on your Project size and previous usage, instead of the default volume size.
 Note
NoteIn a Git-based Project, the first Workspace you launch always uses the volume size configured in your Project settings. Subsequent Workspace launches receive volume provisioning recommendations.
-
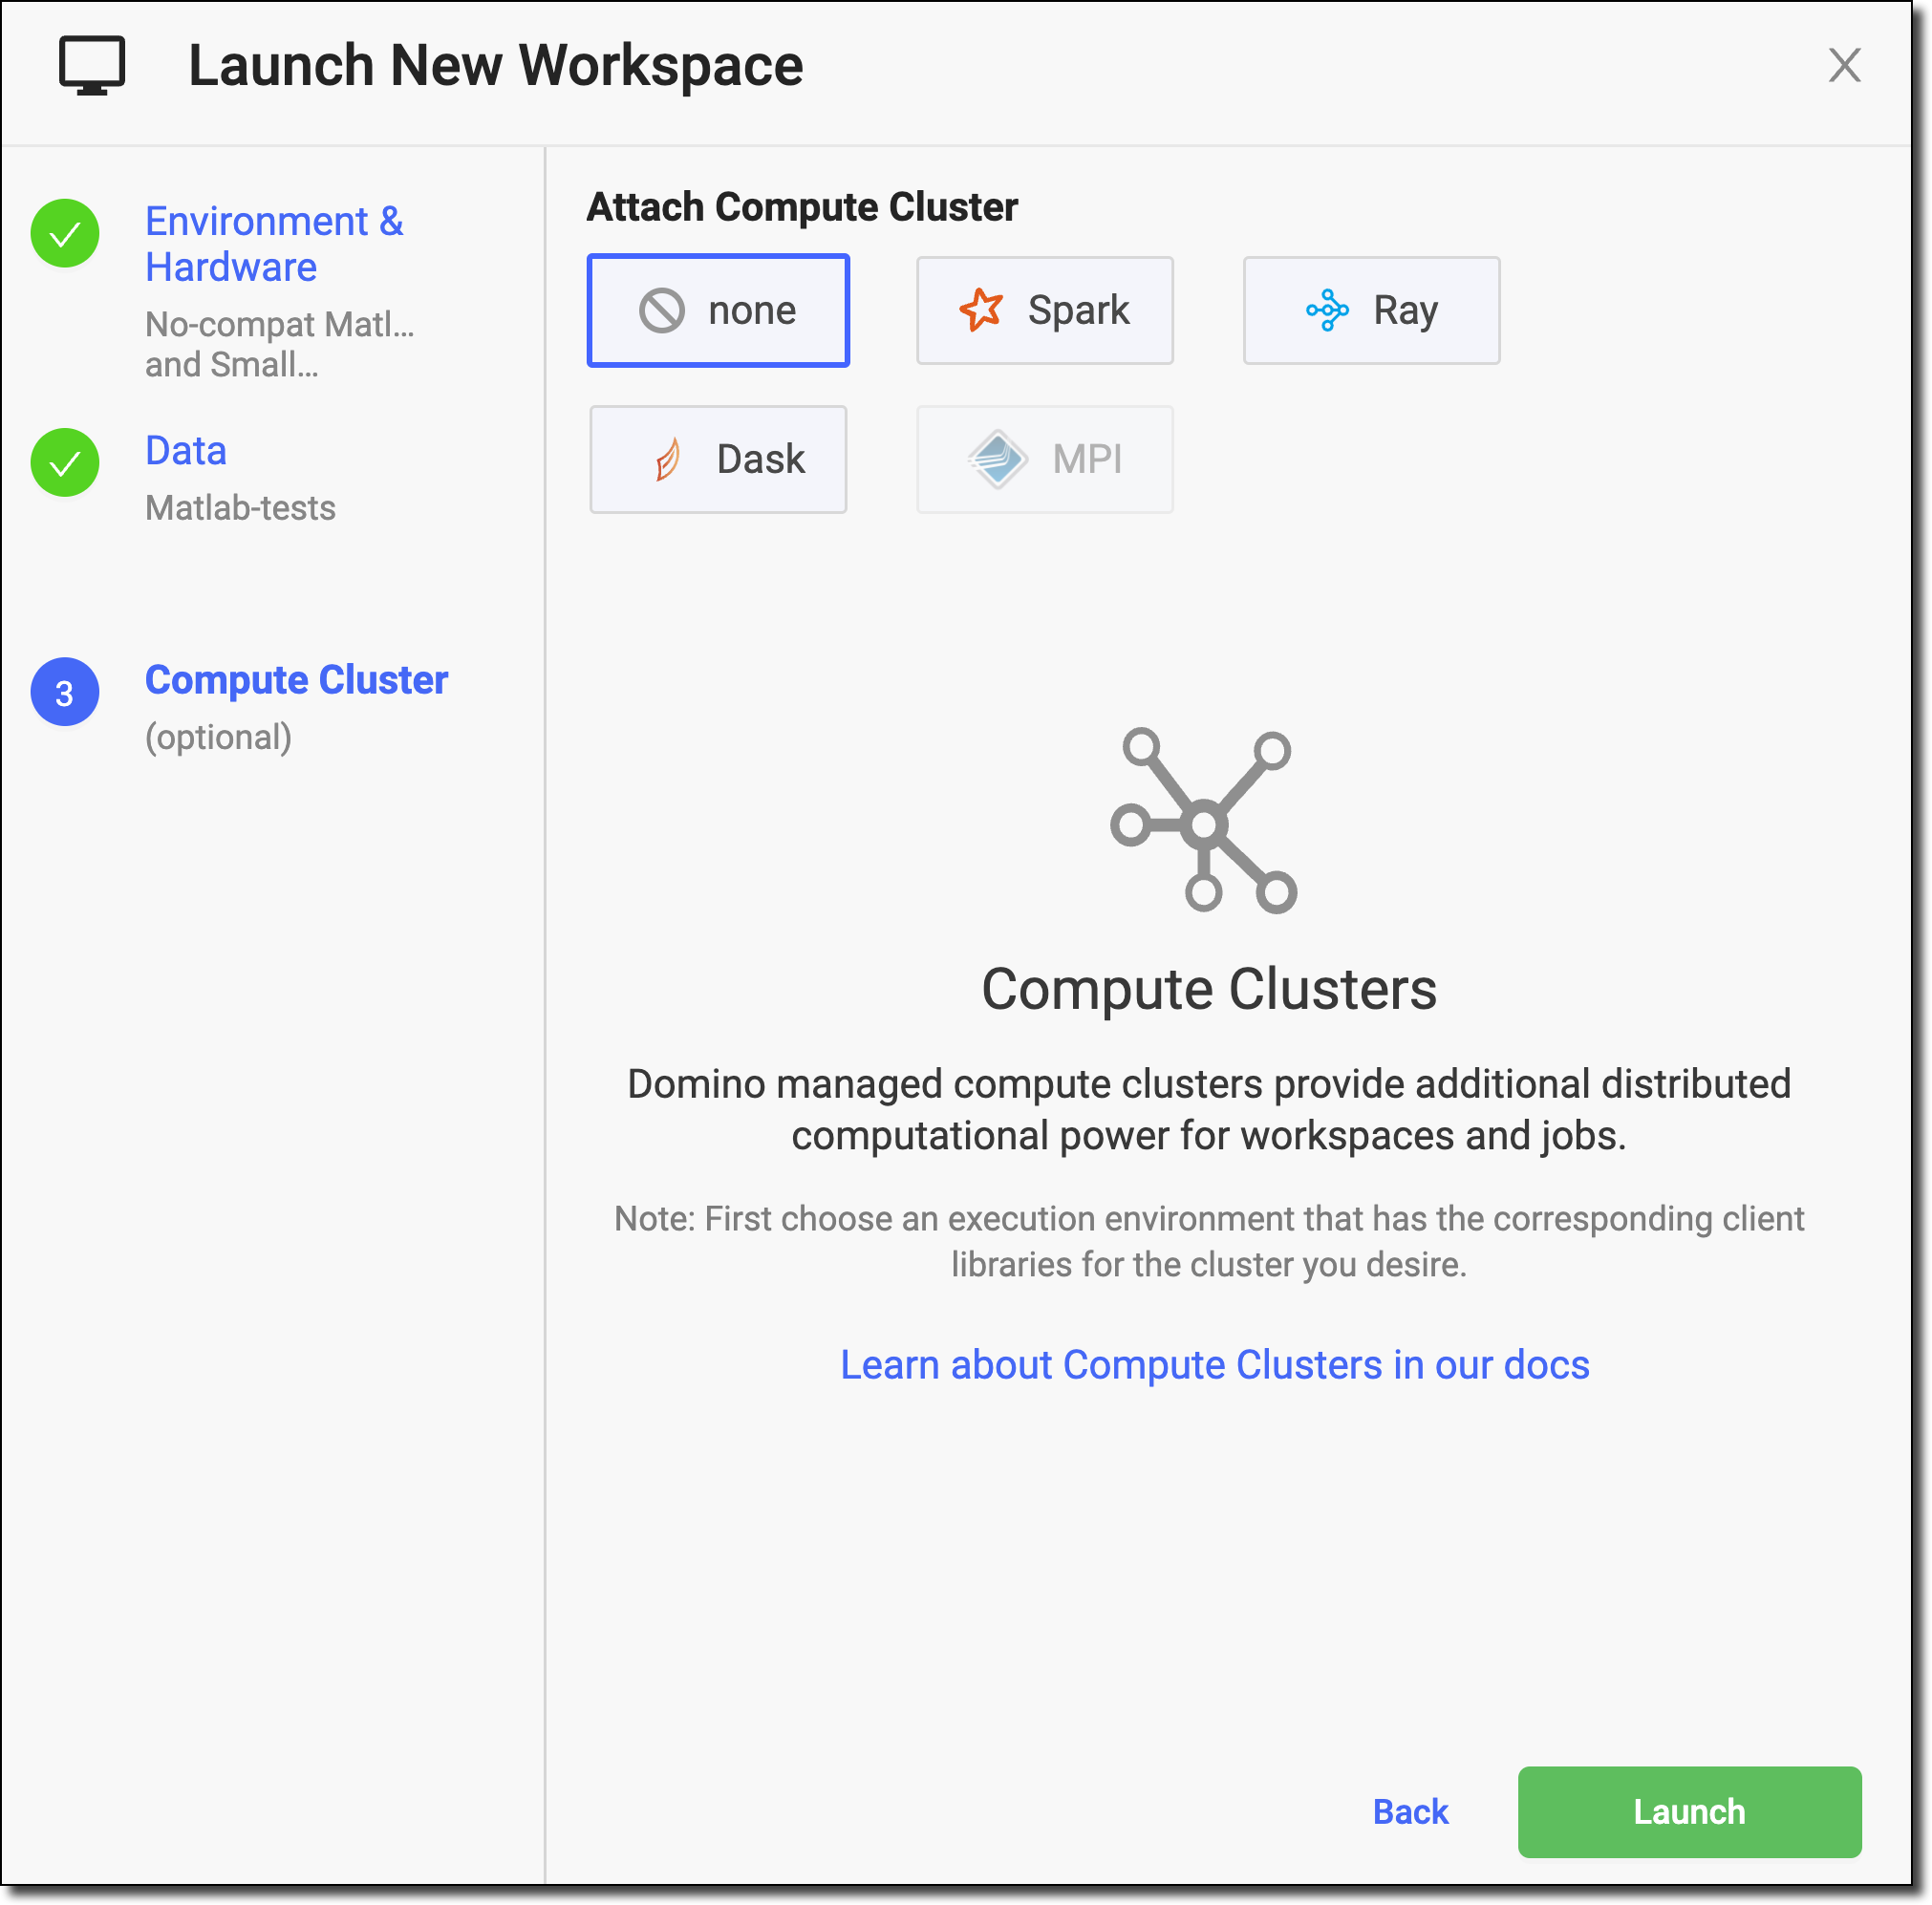
Click Next to attach a compute cluster or view additional details of the Workspace (or click Launch to skip those options).
-
If necessary, attach a compute cluster to your Workspace. To learn more about clusters, see the following:
-
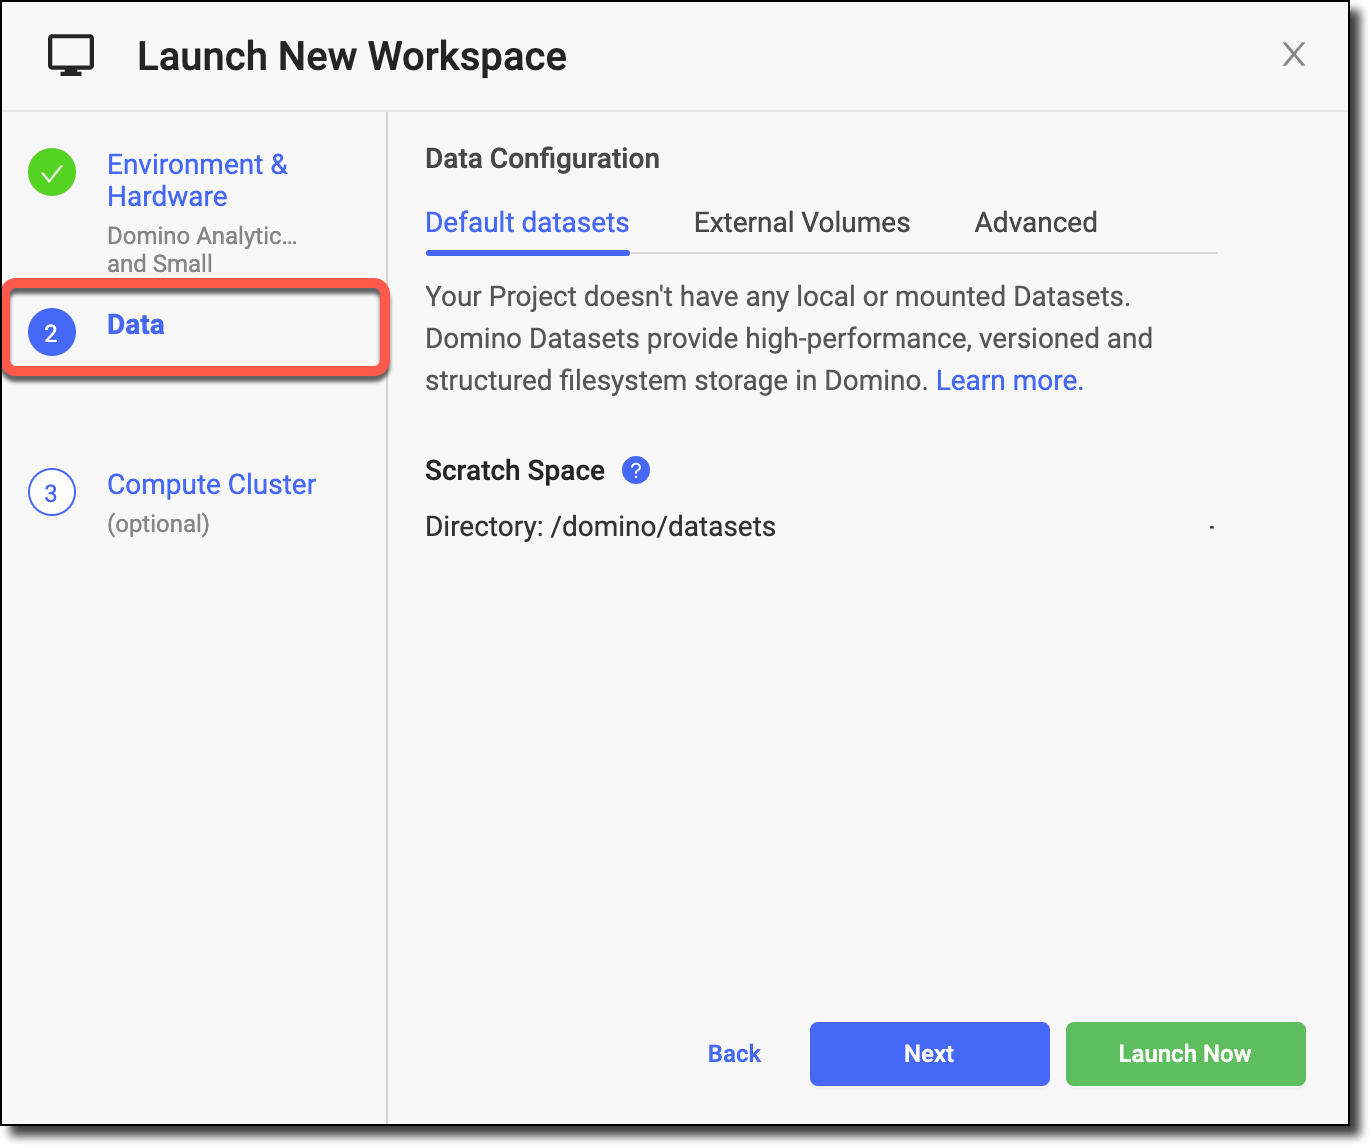
Optional: Configure Datasets or external data volumes in the Data section of the modal.
-
Click Next if you want to review the Datasets and external data volumes in your Project. Otherwise, click Launch.
Domino shows you what data will be mounted in your Workspace.
|
Tip
| When a Workspace, Job, or other execution starts, all project files — including from the main DFS repo, main git repo (if applicable), and any imported git repos and Domino Projects — must be transferred over the network to the Persistent Volume for the execution. Large file counts or very large individual files can significantly delay the startup process. In contrast, files in a Domino Dataset or External Data Volume do not require network transfer. If your executions spend considerable time preparing files during startup, assess if files in in the main DFS repo, main git repo (if applicable), and any imported git repos and Domino Projects must be in that repo. If not, you can relocate these files to a Domino Dataset or External Data Volume to expedite startup. |
-
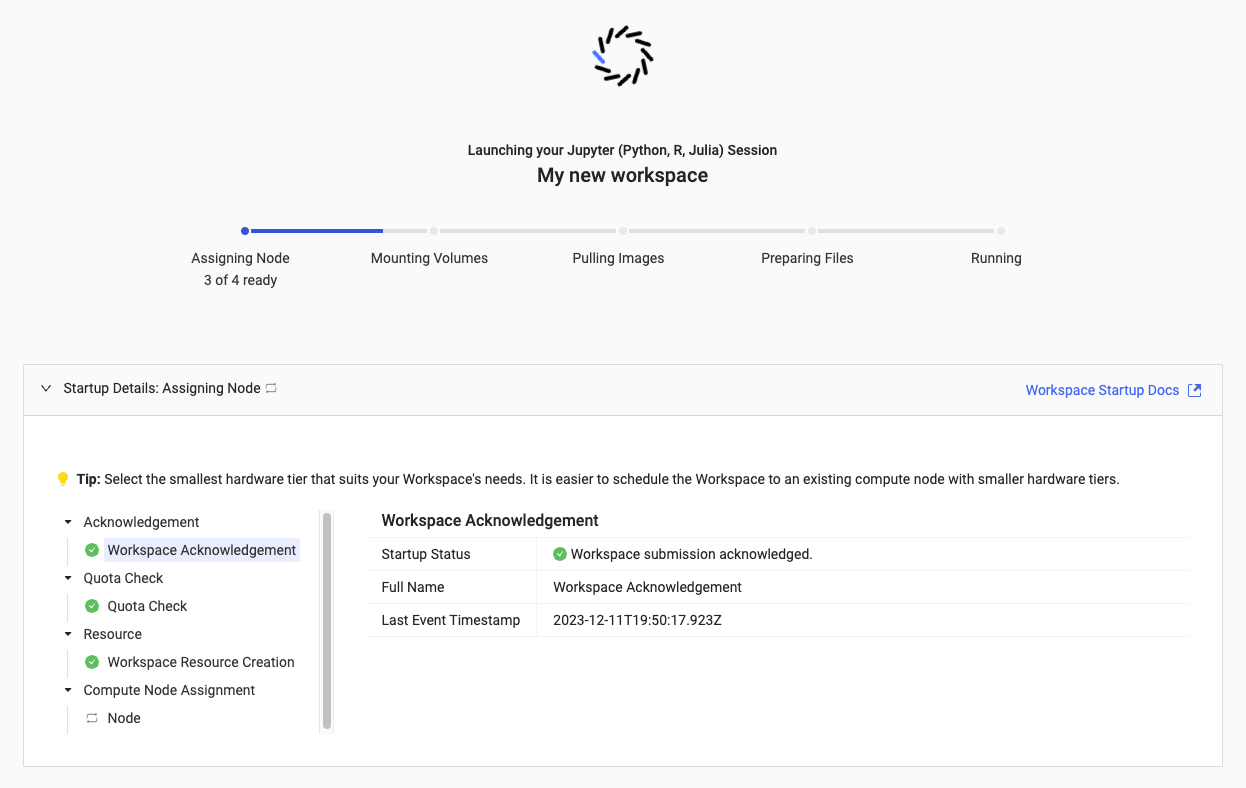
Click Launch. A new tab opens and the Workspace starts loading.
|
Important
|
|