domino logo
Tech Ecosystem
Get started with Python
Step 0: Orient yourself to DominoStep 1: Create a projectStep 2: Configure your projectStep 3: Start a workspaceStep 4: Get your files and dataStep 5: Develop your modelStep 6: Clean up WorkspacesStep 7: Deploy your model
Get started with R
Step 0: Orient yourself to Domino (R Tutorial)Step 1: Create a projectStep 2: Configure your projectStep 3: Start a workspaceStep 4: Get your files and dataStep 5: Develop your modelStep 6: Clean up WorkspacesStep 7: Deploy your model
Get Started with MATLAB
Step 1: Orient yourself to DominoStep 2: Create a Domino ProjectStep 3: Configure Your Domino ProjectStep 4: Start a MATLAB WorkspaceStep 5: Fetch and Save Your DataStep 6: Develop Your ModelStep 7: Clean Up Your Workspace
Step 8: Deploy Your Model
Scheduled JobsLaunchers
Step 9: Working with Domino Datasets
Domino Reference
Projects
Projects Overview
Revert Projects and Files
Revert a ProjectRevert a File
Projects PortfolioReference ProjectsProject Goals in Domino 4+
Git Integration
Git Repositories in DominoGit-based Projects with CodeSyncWorking from a Commit ID in Git
Jira Integration in DominoUpload Files to Domino using your BrowserCopy ProjectsFork and Merge ProjectsSearchSharing and CollaborationCommentsDomino Service FilesystemCompare File RevisionsArchive a Project
Advanced Project Settings
Project DependenciesProject TagsRename a ProjectSet up your Project to Ignore FilesUpload files larger than 550MBExporting Files as a Python or R PackageTransfer Project Ownership
Domino Runs
JobsDiagnostic Statistics with dominostats.jsonNotificationsResultsRun Comparison
Advanced Options for Domino Runs
Run StatesDomino Environment VariablesEnvironment Variables for Secure Credential StorageUse Apache Airflow with Domino
Scheduled Jobs
Domino Workspaces
WorkspacesUse Git in Your WorkspaceUse Visual Studio Code in Domino WorkspacesPersist RStudio PreferencesAccess Multiple Hosted Applications in one Workspace Session
Spark on Domino
On-Demand Spark
On-Demand Spark OverviewValidated Spark VersionConfigure PrerequisitesWork with your ClusterManage DependenciesWork with Data
External Hadoop and Spark
Hadoop and Spark OverviewConnect to a Cloudera CDH5 cluster from DominoConnect to a Hortonworks cluster from DominoConnect to a MapR cluster from DominoConnect to an Amazon EMR cluster from DominoRun Local Spark on a Domino ExecutorUse PySpark in Jupyter WorkspacesKerberos Authentication
On-Demand Ray
On-Demand Ray OverviewValidated Ray VersionConfigure PrerequisitesWork with your ClusterManage DependenciesWork with Data
On-Demand Dask
On-Demand Dask OverviewValidated Dask VersionConfigure PrerequisitesWork with Your ClusterManage DependenciesWork with Data
Customize the Domino Software Environment
Environment ManagementDomino Standard EnvironmentsInstall Packages and DependenciesAdd Workspace IDEsAdding Jupyter Kernels
Partner Environments for Domino
Use MATLAB as a WorkspaceUse Stata as a WorkspaceUse SAS as a WorkspaceNVIDIA NGC Containers
Advanced Options for Domino Software Environment
Install Custom Packages in Domino with Git IntegrationAdd Custom DNS Servers to Your Domino EnvironmentConfigure a Compute Environment to User Private Cran/Conda/PyPi MirrorsUse TensorBoard in Jupyter Workspaces
Publish your Work
Publish a Model API
Model Publishing OverviewModel Invocation SettingsModel Access and CollaborationModel Deployment ConfigurationPromote Projects to ProductionExport Model Image
Publish a Web Application
App Publishing OverviewGet Started with DashGet Started with ShinyGet Started with FlaskContent Security Policies for Web Apps
Advanced Web Application Settings in Domino
App Scaling and PerformanceHost HTML Pages from DominoHow to Get the Domino Username of an App Viewer
Launchers
Launchers OverviewAdvanced Launcher Editor
Assets Portfolio Overview
Model Monitoring
Model Monitoring APIsAccessing The Model MonitorGet Started with Model MonitoringModel Monitor DeploymentIngest Data into The Model MonitorModel RegistrationMonitoring Data DriftMonitoring Model QualitySetting Scheduled Checks for the ModelConfigure Notification Channels for the ModelUse Model Monitoring APIsProduct Settings
Connect to your Data
Data in Domino
Datasets OverviewDatasets Best Practices
Data Sources Overview
Connect to Data Sources
External Data Volumes
Work with Data Best Practices
Work with Big Data in DominoWork with Lots of FilesMove Data Over a Network
Advanced User Configuration Settings
User API KeysDomino TokenOrganizations Overview
Use the Domino Command Line Interface (CLI)
Install the Domino Command Line (CLI)Domino CLI ReferenceDownload Files with the CLIForce-Restore a Local ProjectMove a Project Between Domino DeploymentsUse the Domino CLI Behind a Proxy
Browser Support
Get Help with Domino
Additional ResourcesGet Domino VersionContact Domino Technical SupportSupport Bundles
domino logo
About Domino
Domino Data LabKnowledge BaseData Science BlogTraining
User Guide
>
Get Started with MATLAB
>
Step 5: Fetch and Save Your Data

Step 5: Fetch and Save Your Data

Work with data in Domino:
  1. You can copy your data into Domino. If you are working with data on your local machine or in a shared server, you might want to upload your data into Domino.

  2. You can query your data from Domino. If you have a large dataset stored in a database or data service, you might have to query the database or the API for the data service..

Step 5.1: Copy data to Domino project

In this step, you’ll use the terminal to copy your data into the project. The starting file path in your workspace is /mnt. By default, this is considered the root of your Domino project. If you add or modify files in /mnt, you can save them back to your project when you stop or sync the workspace.

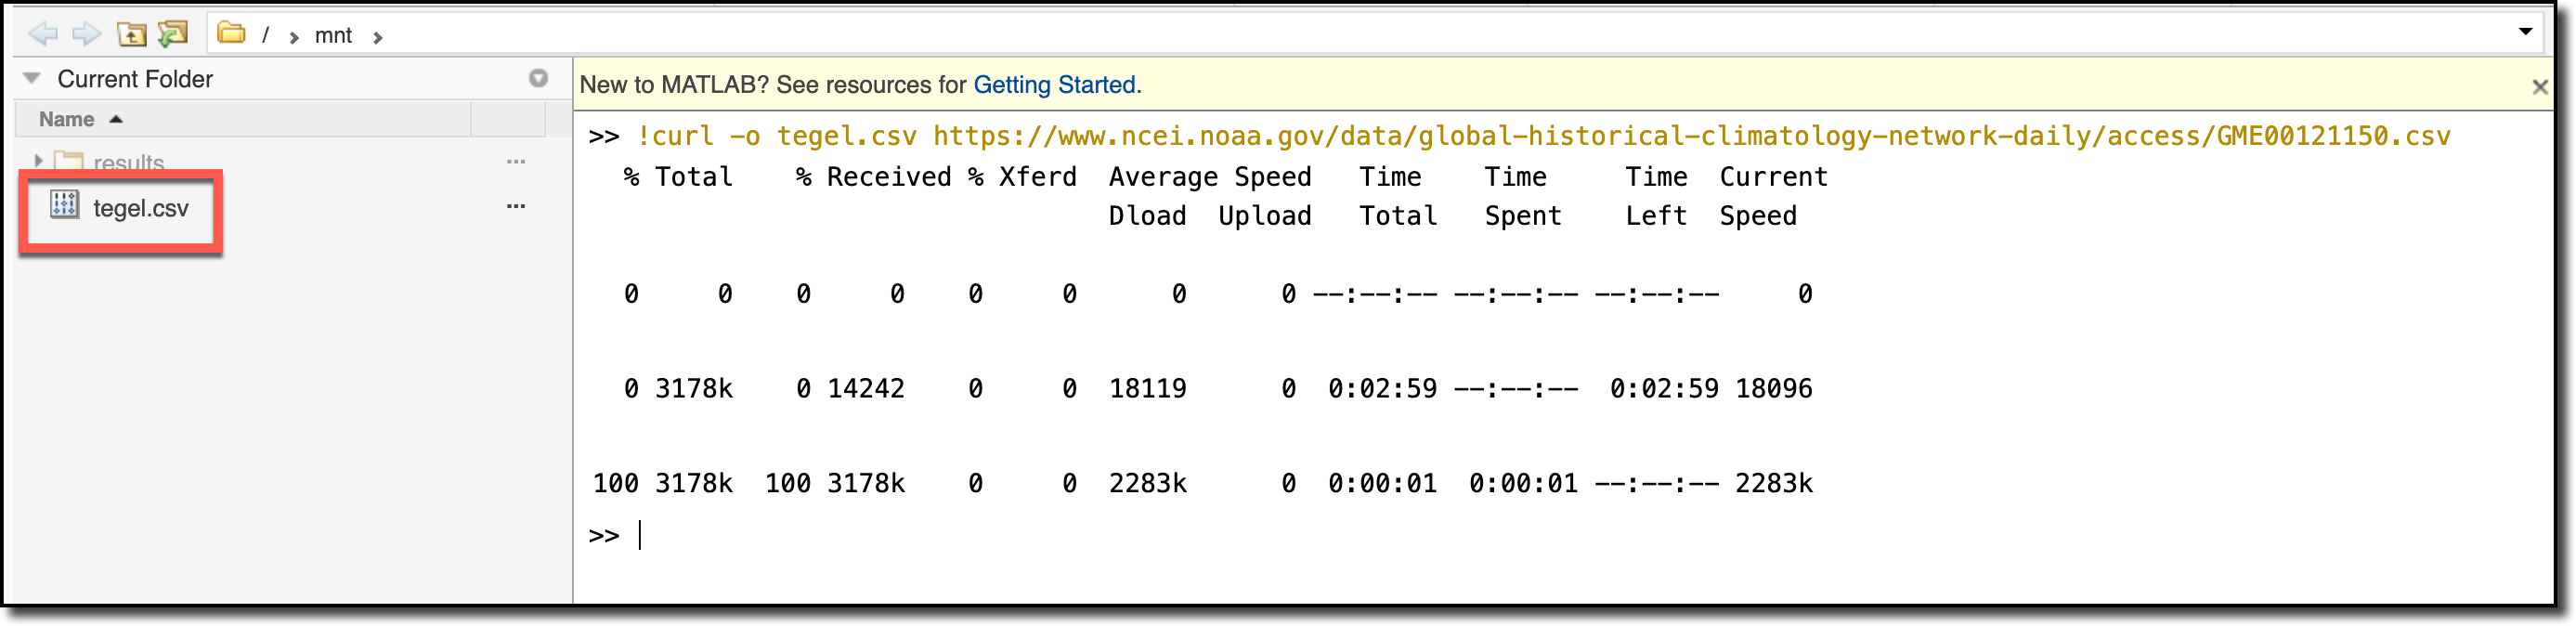
  1. Copy and paste the following command to fetch data from the U.S. NOAA Climatology service.

    !curl -o tegel.csv https://www.ncei.noaa.gov/data/global-historical-climatology-network-daily/access/GME00121150.csv
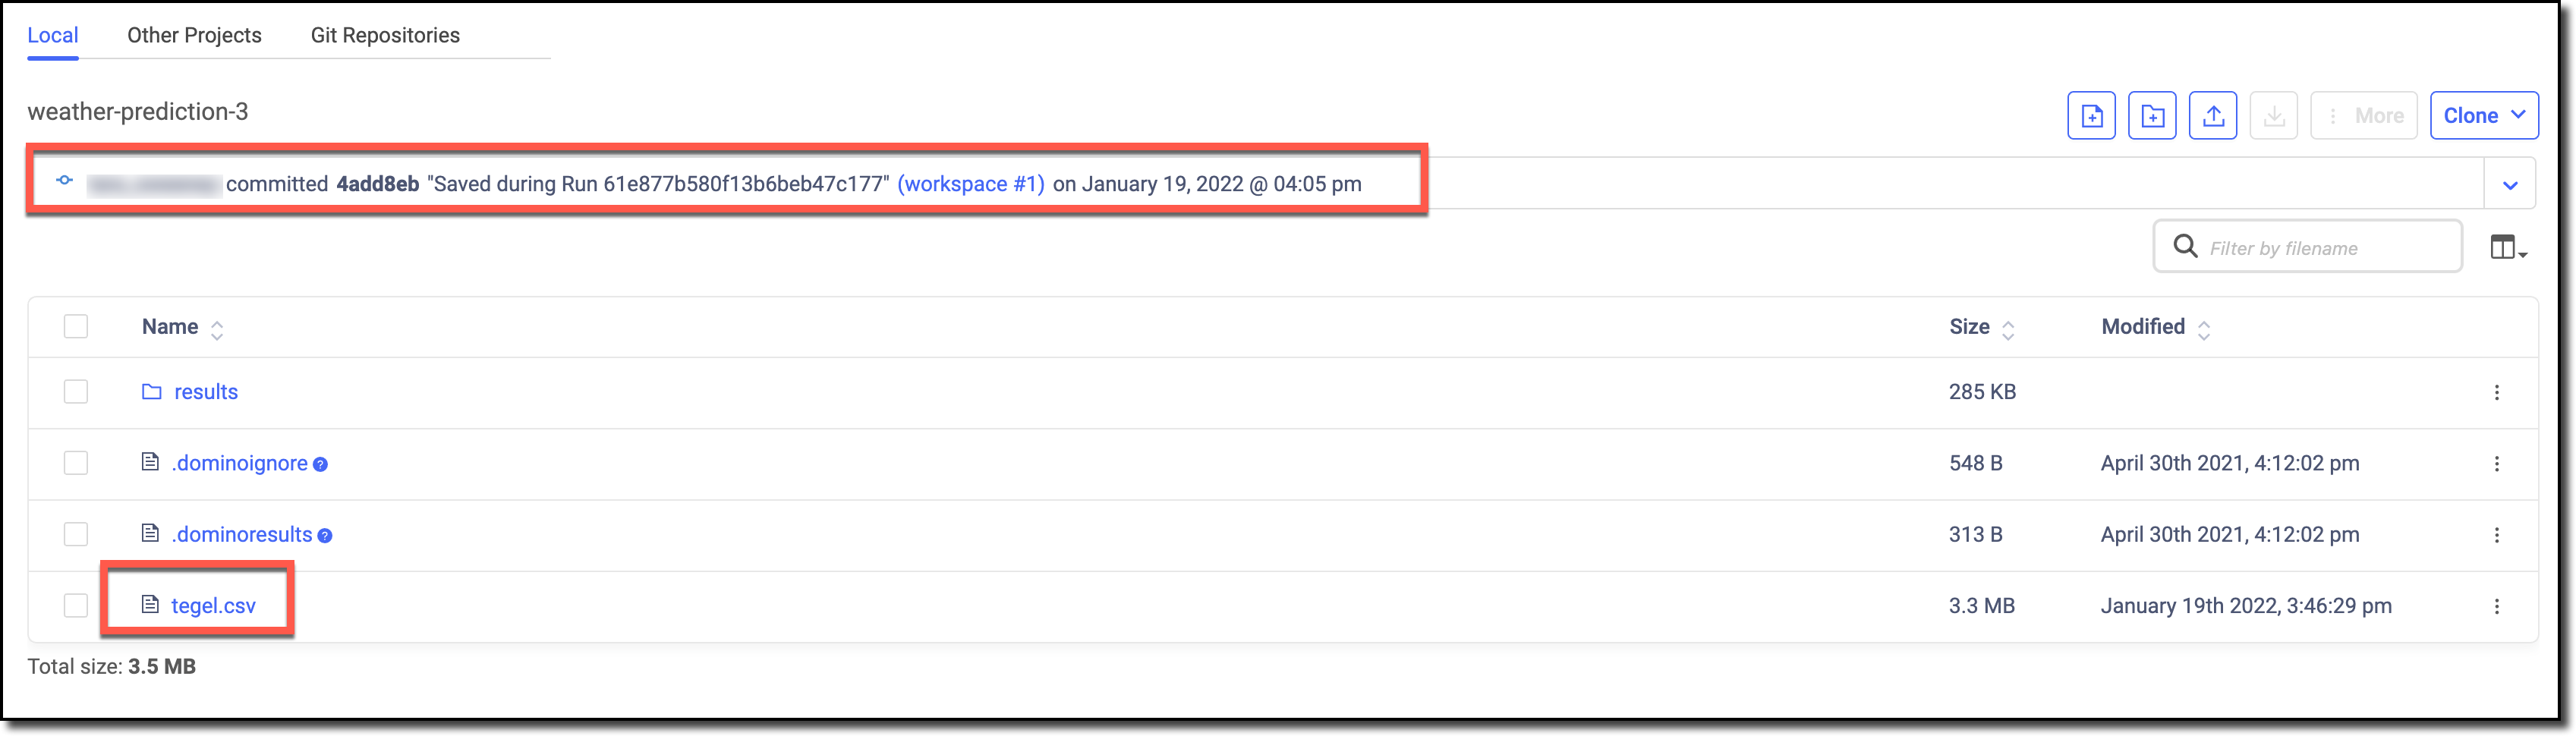
  2. Go to the Current Folder to see the downloaded file.

    matlab file download

Note

Step 5.2: Save data to Domino project

Save the data to your project
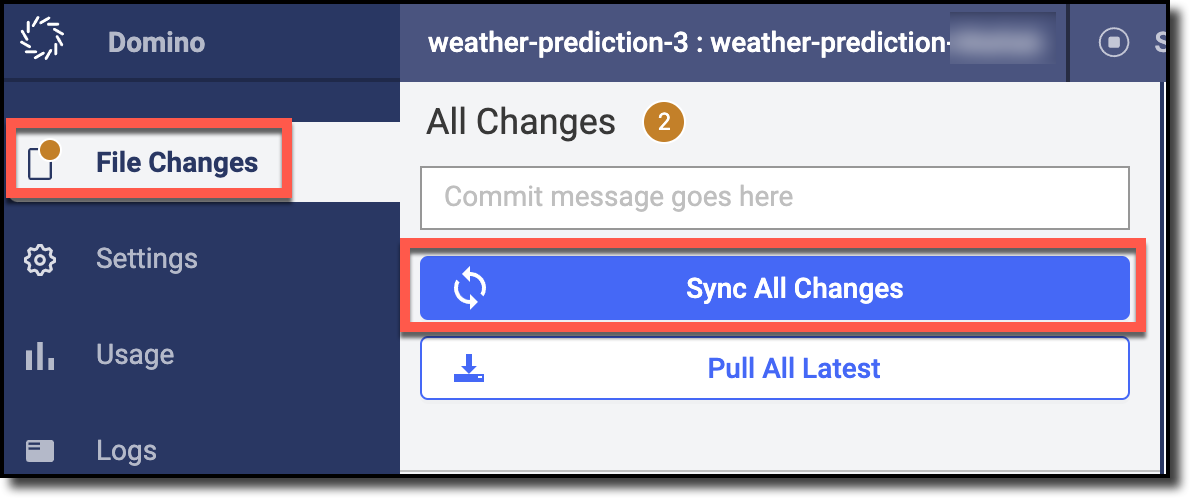
  1. In the navigation bar, click the File Changes icon.

    file changes sync

  2. Click Sync All Changes.

Step 5.3: Review your changes

See the files:
  1. Click Domino.

    domino icon

  2. In the navigation bar, click Files to see the file that you downloaded in the previous steps. Notice that a new revision has been saved.

    downloaded file

See the documentation about other methods to copy data into Domino and query data from Domino.

Domino Data LabKnowledge BaseData Science BlogTraining
Copyright © 2022 Domino Data Lab. All rights reserved.