This article describes how to use Domino Datasets to solve problems, improve collaboration, and open new workflow possibilities in Domino.
Store more files, bigger files, and access them faster
When you start a run or launch a workspace, Domino copies your project files to an executor. When working with large volumes of data, this presents three potential problems:
-
The number of files that can be stored in Domino project files may exceed the configurable limit. By default, the limit is 10,000 files.
-
There is a limit to the size of any individual file that can be transferred to and from your Domino project files. By default, this limit is 8GB.
-
The time required to transfer data to and from the executor is proportional to the size of the data. It can take a long time if the size of the data is very large, leading to long startup and shutdown times for runs and workspaces.
-
There is no limit to the number of files that can be stored in a Domino Dataset.
-
There is no limit to the size of any individual file stored in a Domino Dataset.
-
Domino Datasets are attached to executors as networked filesystems, removing the need to transfer their contents to the executor when starting a run or workspace.
Build multiple curated collections of shareable data in your project
If you use project imports and exports to share data with other members of your team, the consumers of your project will receive the entire contents of your project files in their Runs and Workspaces. That works well if your project is small, simple, and narrowly scoped.
However, for large projects that produce many data products, you may want to expose them to your consumers in smaller, curated subsets. You can do this with Domino Datasets.
Consider the project shown below.
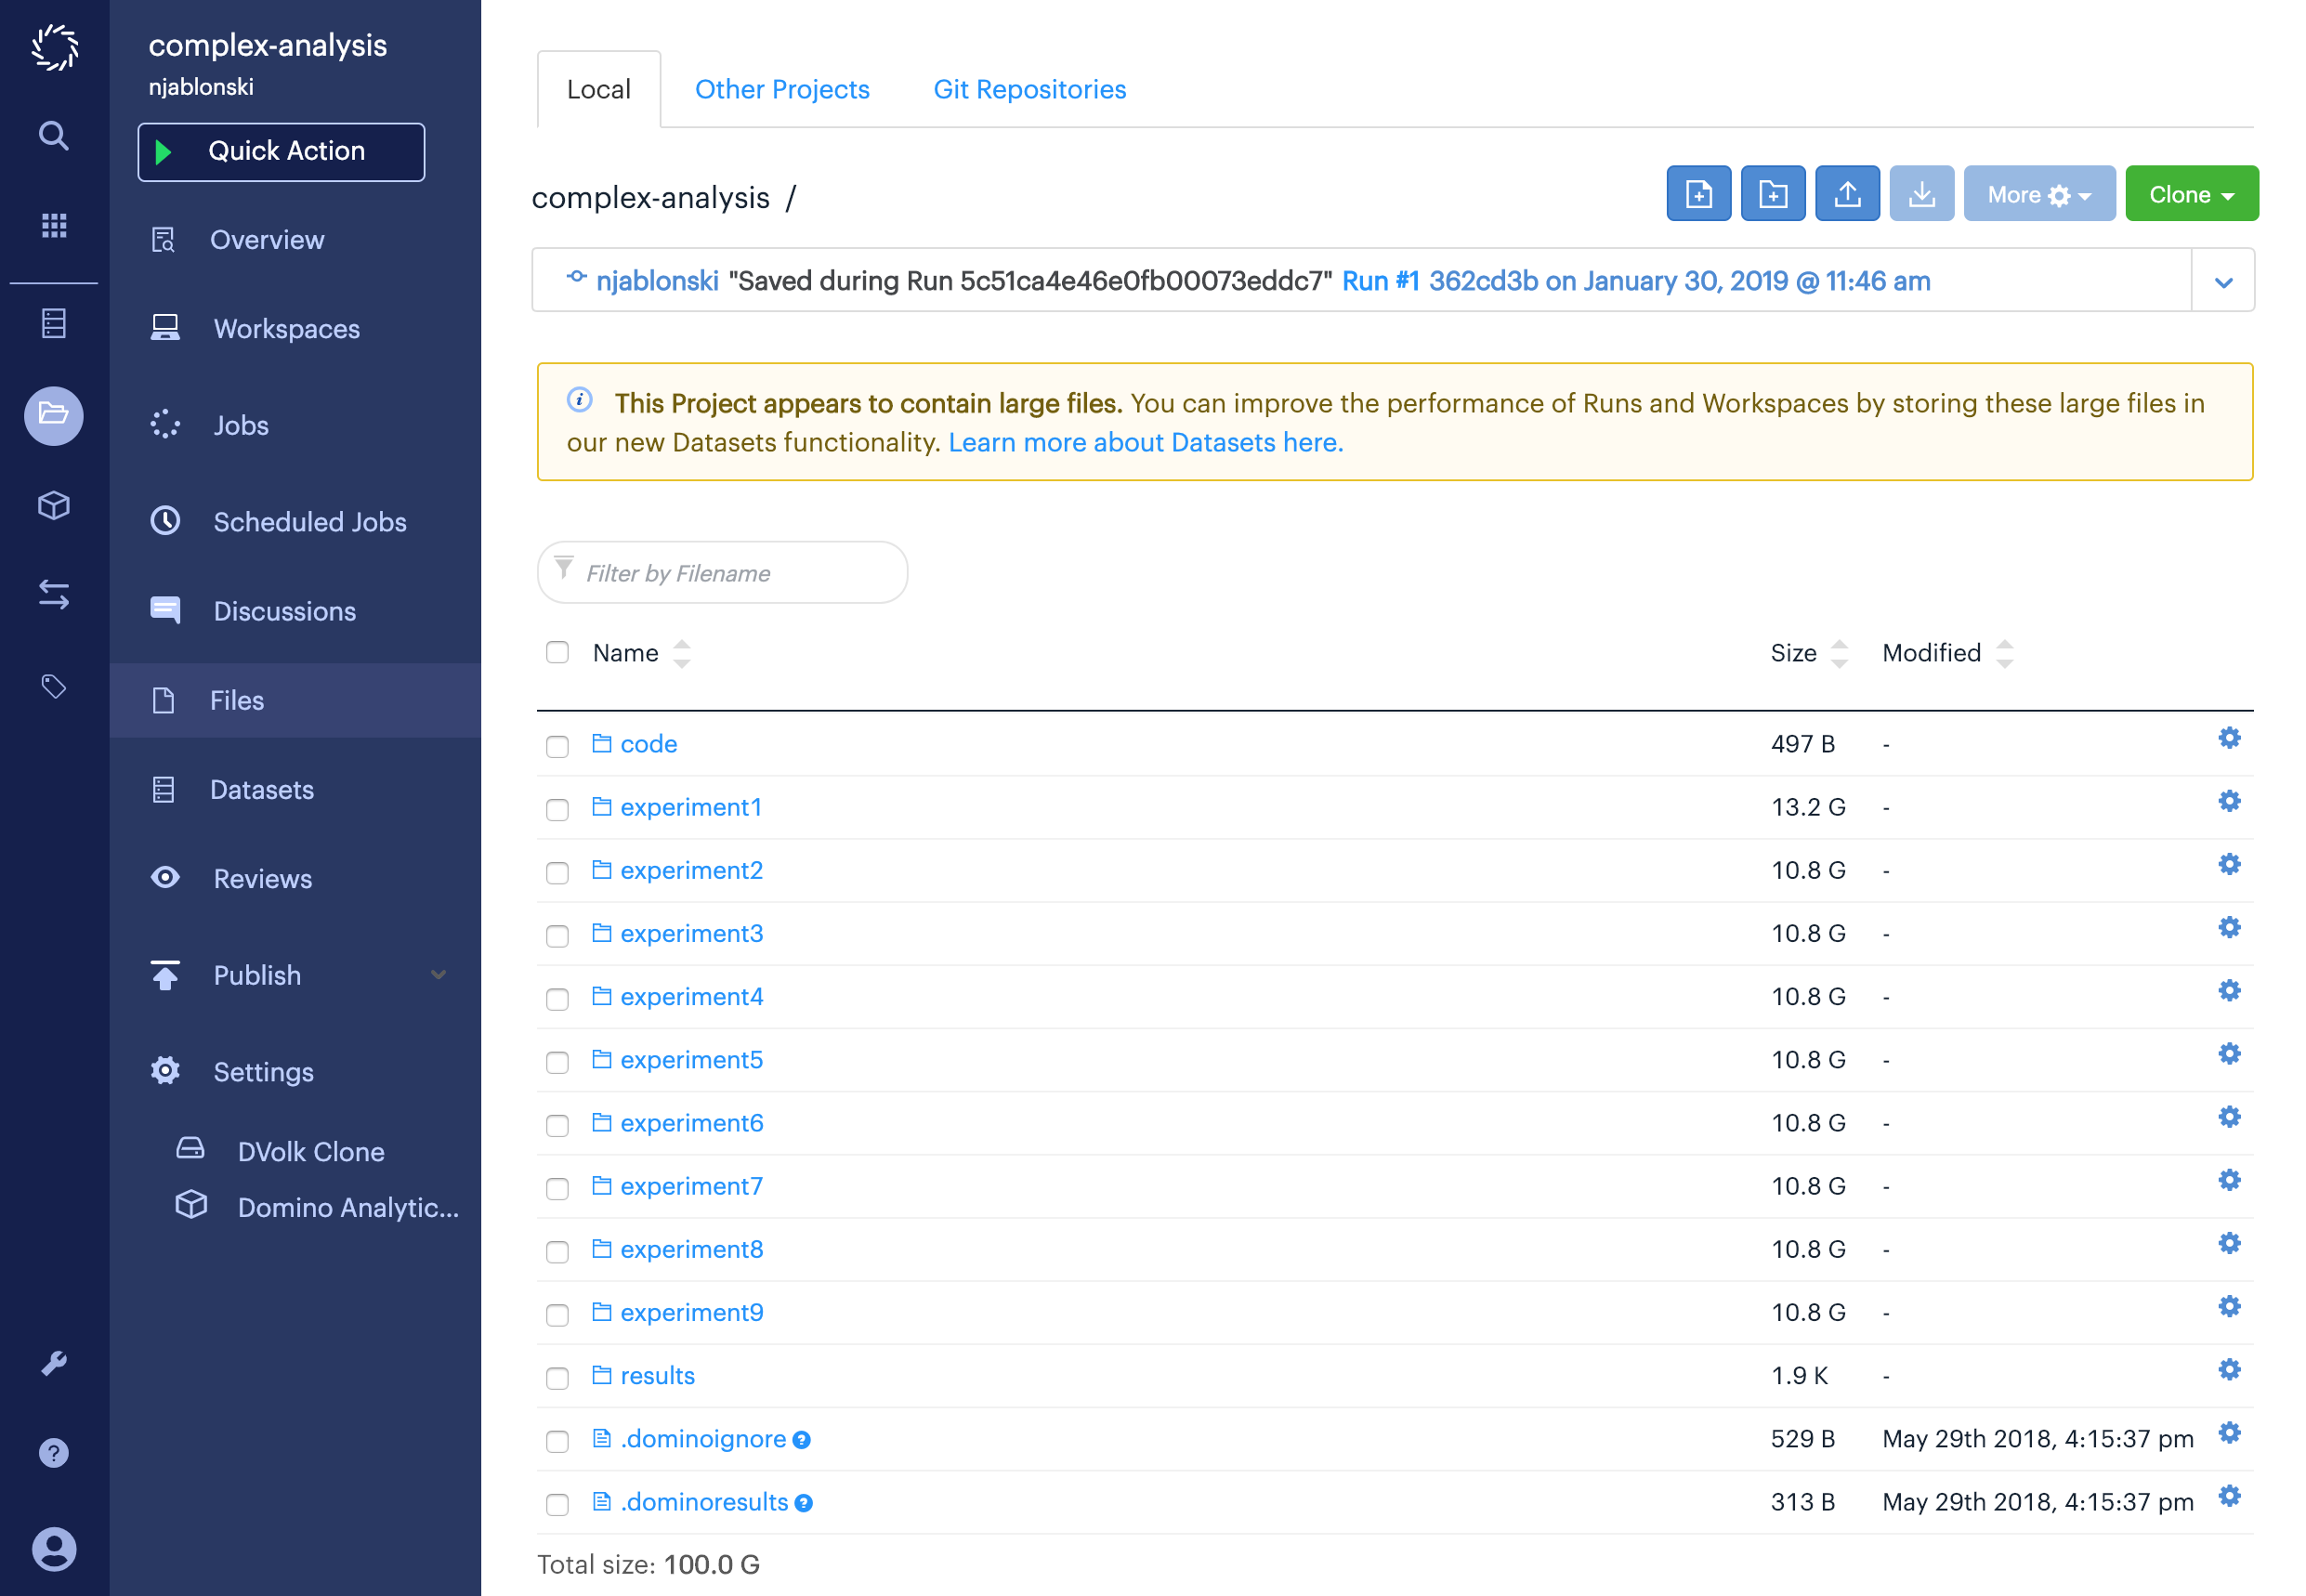
This project has a small folder full of code, plus nine folders full of various kinds of various output data. Each data folder is larger than 10GB, and the whole project is 100GB. It would be impractical to ask your data consumers to import this project, but you also don’t want to separate the data from the code that produced it by moving the data to a different project.
The solution is to organize the data into Datasets, with one Dataset for each type of data your consumers are interested in.
In this example, suppose you have two colleagues who want to consume your data.
One of them is only interested in the data from the experiment1 folder, and the other is only interested in the data from experiment9.
You can follow the instructions on writing to a local Dataset to create and write to two Datasets with scripts like the following, where it’s assumed you have named the Datasets experiment1-data and experiment9-data.
experiment1-populate-dataset.sh
cp -R $DOMINO_WORKING_DIR/experiment1/. /domino/datasets/experiment1-data/output
experiment9-populate-dataset.sh
cp -R $DOMINO_WORKING_DIR/experiment9/. /domino/datasets/experiment9-data/output
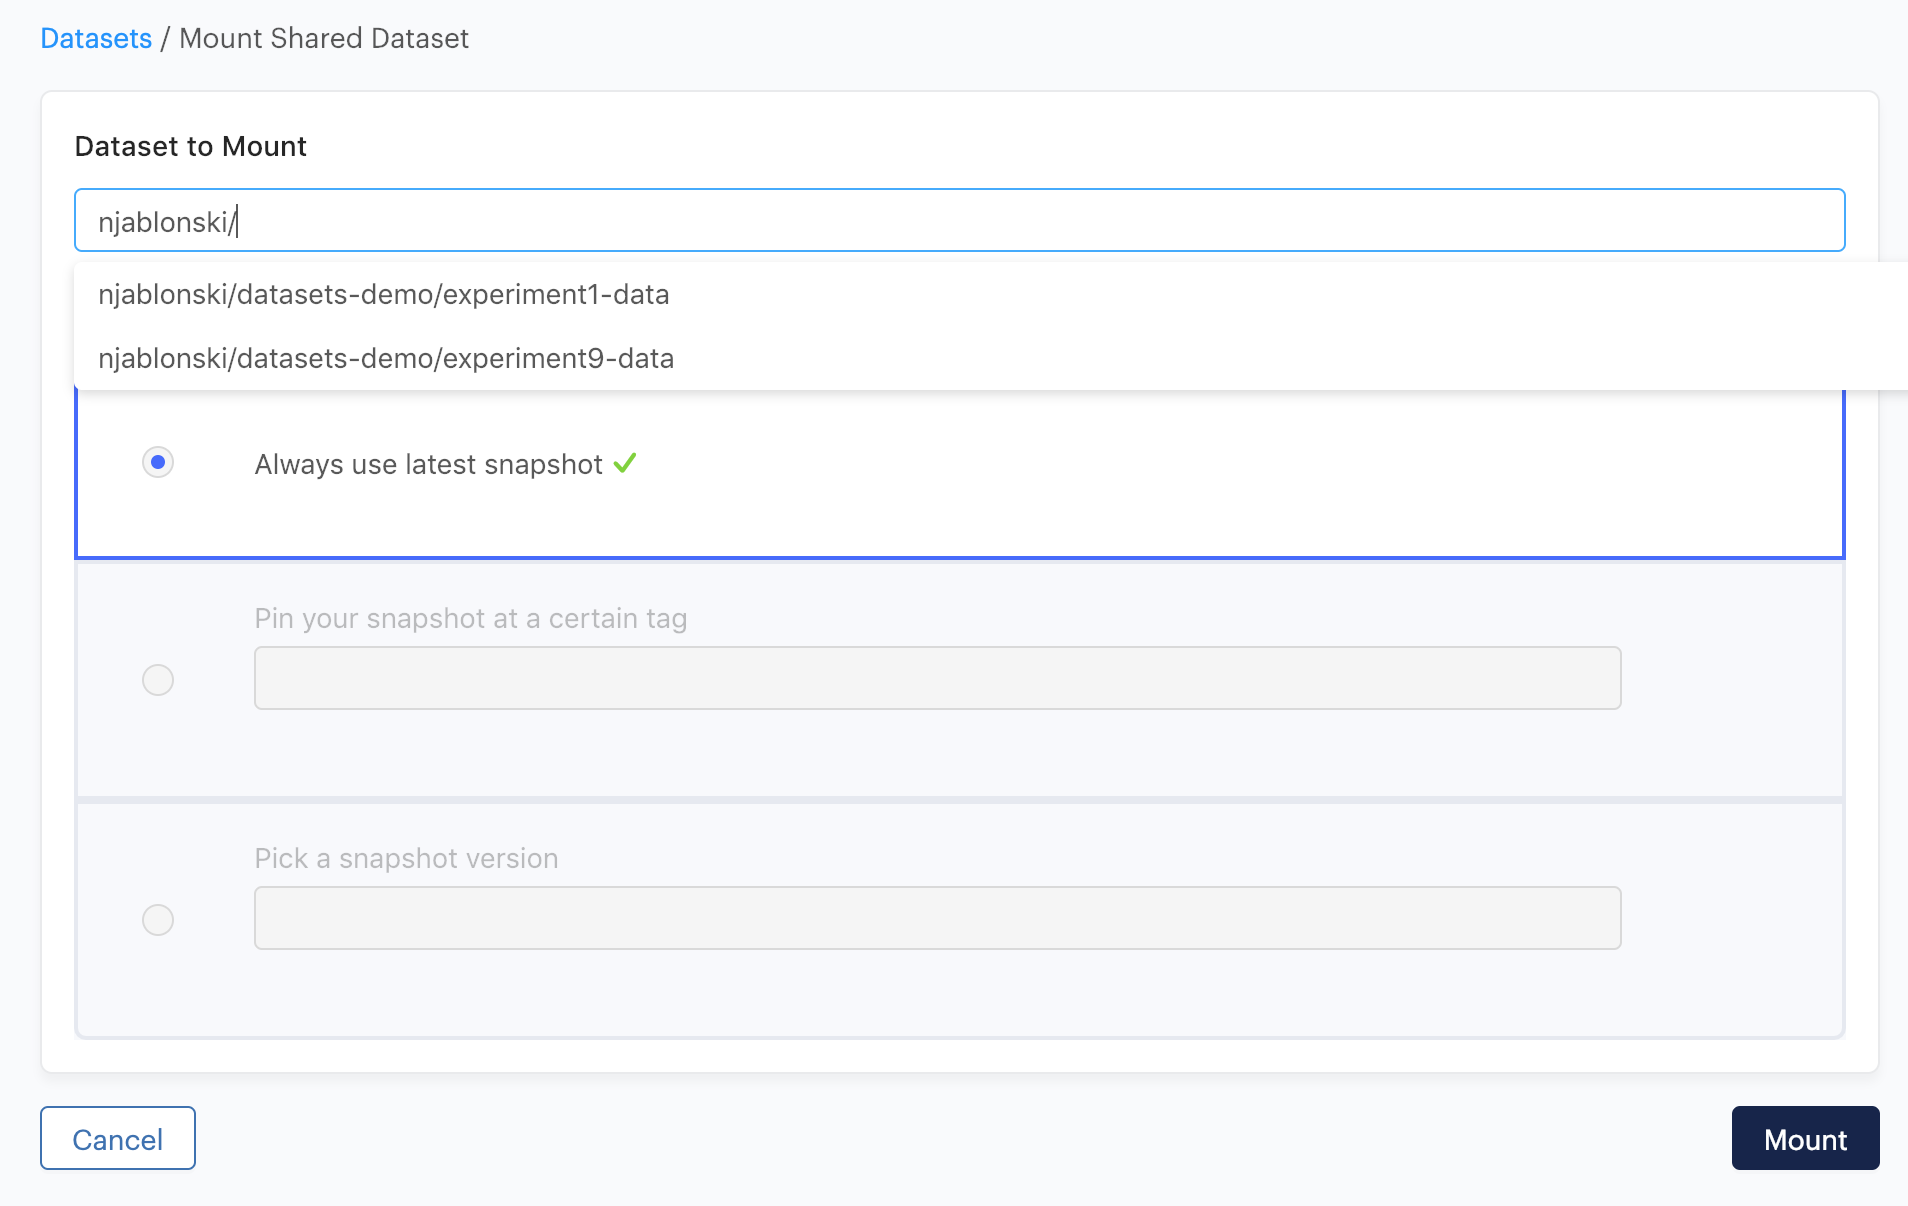
Your consumers can then mount only the datasets they are interested in.
If you are working with data at this scale, you should write it to Datasets whenever you produce it, instead of storing it in your project files.
You can execute your experiment code from the Datasets upload interface, and make the Dataset output directory the destination for your data products. If you want to write to multiple Datasets in the same run, check out the Datasets advanced mode.
Track production and testing states of your data
If you have a Dataset that is being used by downstream consumers for critical work, tagging allows you to continue to improve, process, and experiment with new Snapshots without impacting those consumers. When you have improved data ready for use, you can switch which Snapshot is tagged, and your tag consumers will automatically start getting your new data.
Consider the Dataset shown below.
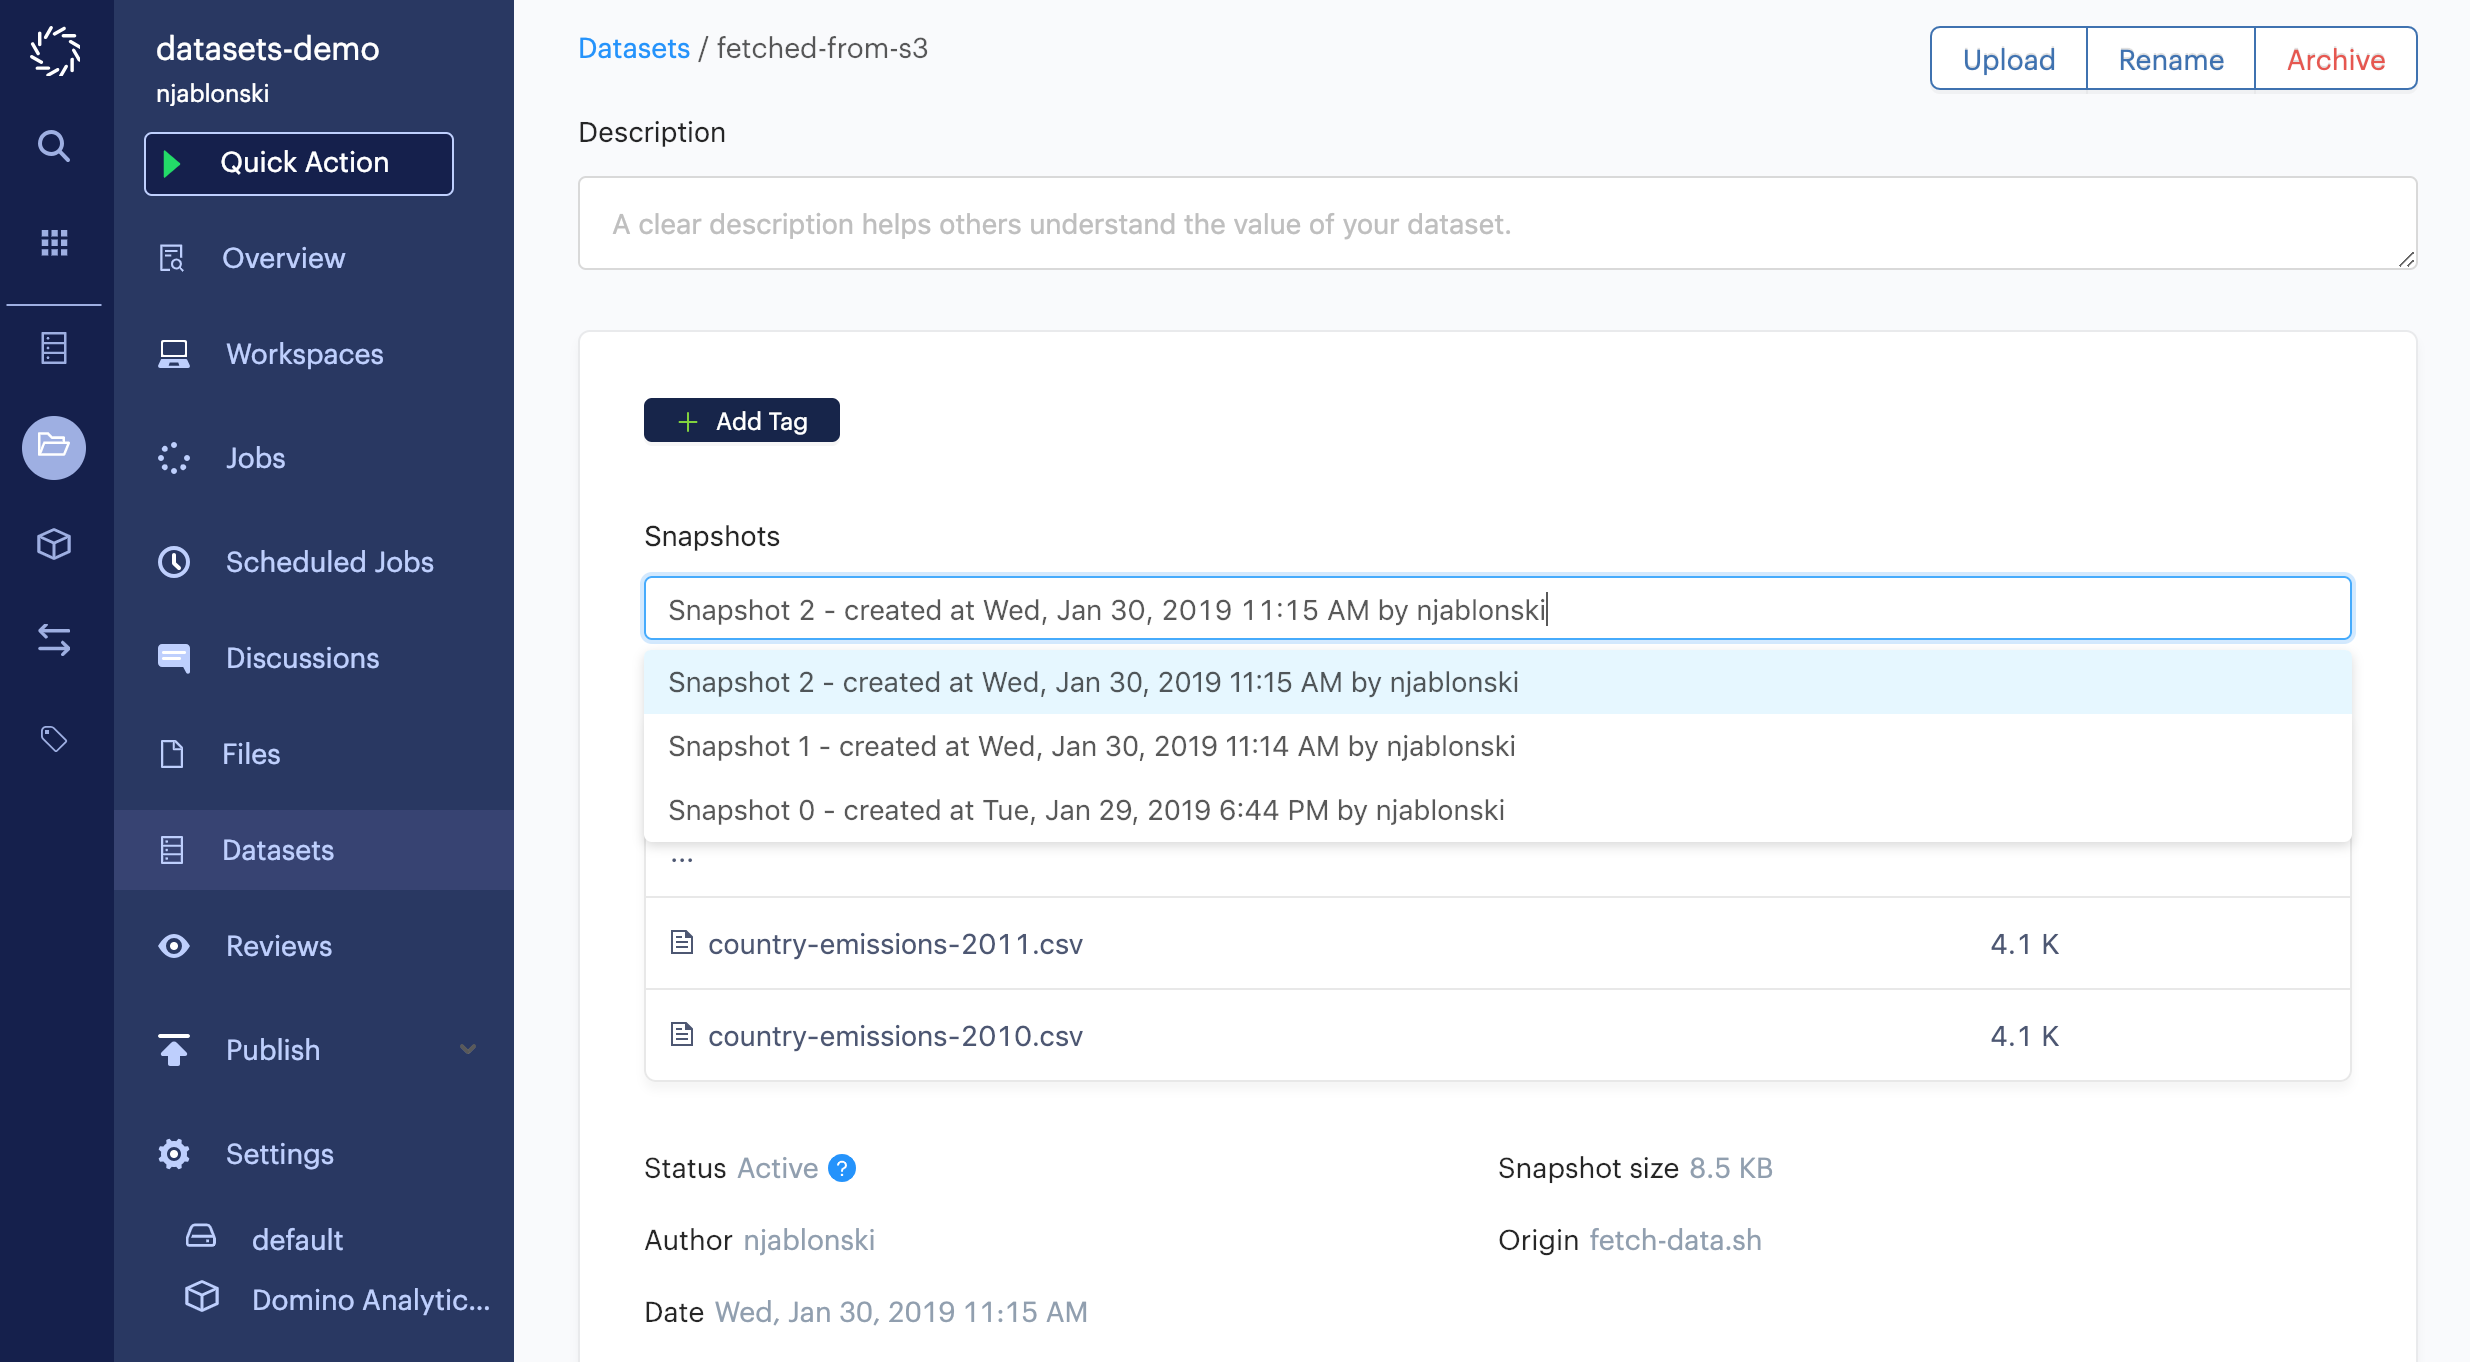
The Dataset has three active snapshots.
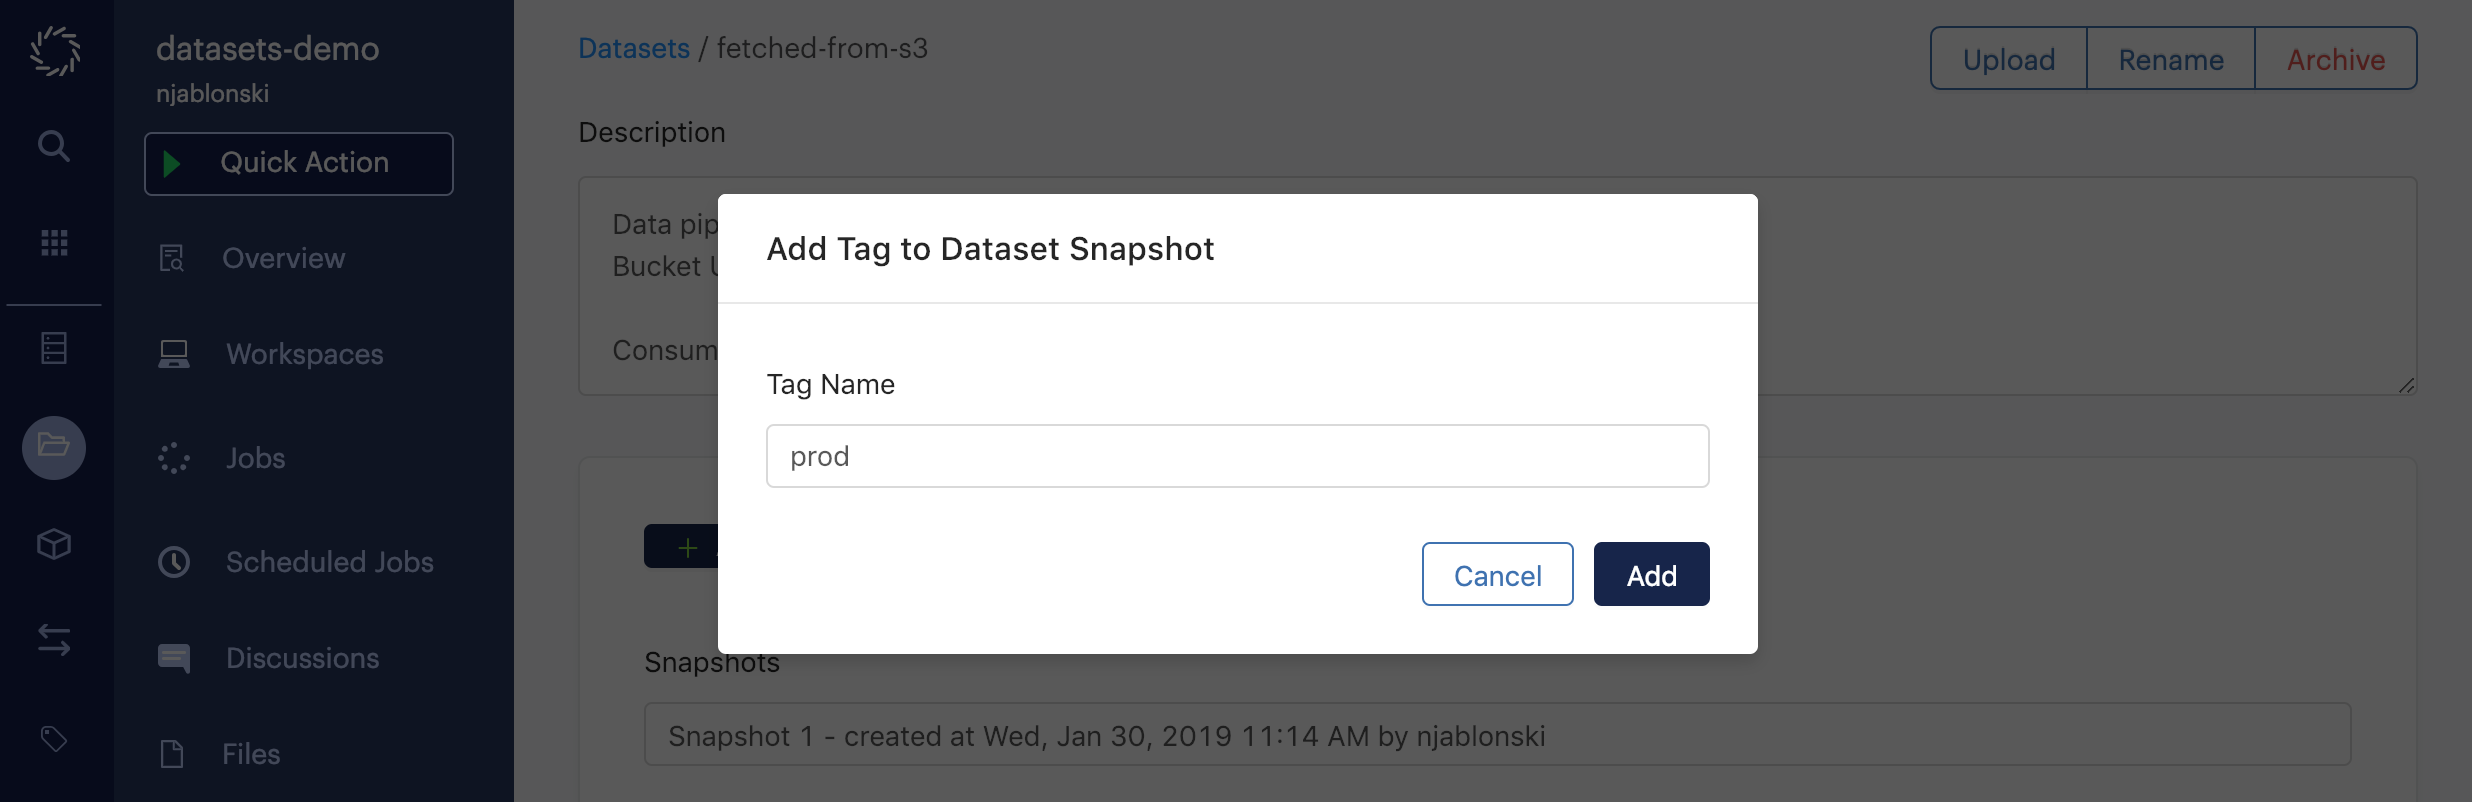
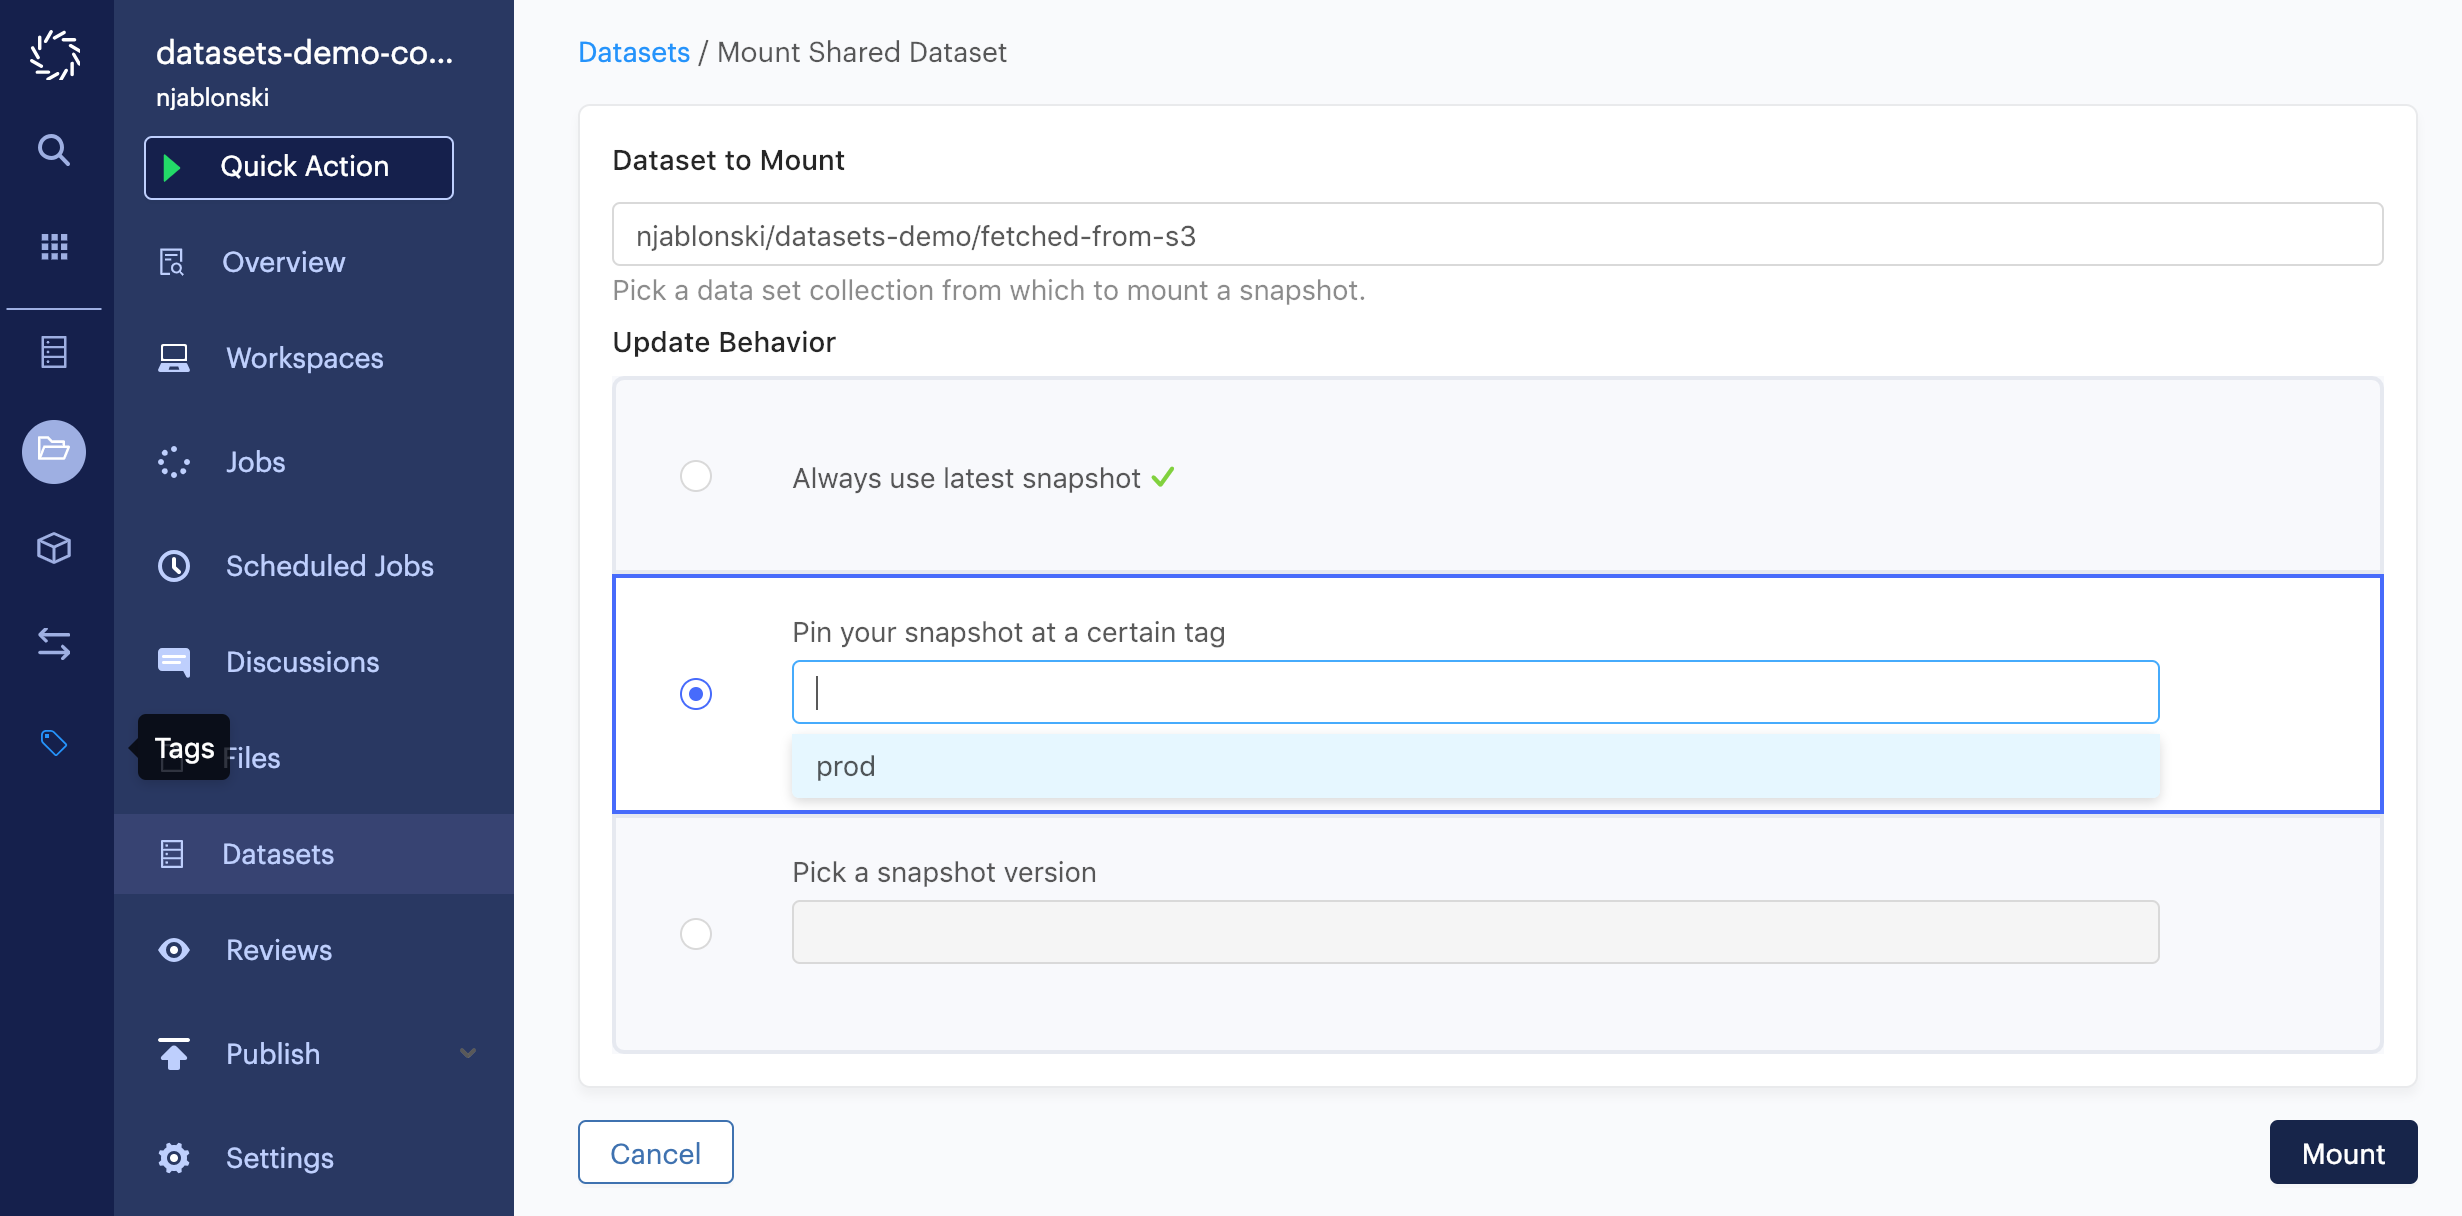
If you decide that you want consumers of this Datasets to work from snapshot 1, since snapshot 2 represents an experimental modification of the data that you are not yet confident in, you can apply a tag like prod to snapshot 1.
When your consumers mount the Dataset in their projects, they have the option to mount whichever Snapshot is marked with a given tag. When they select Pin your snapshot at a certain tag, they will see a menu of available tags.
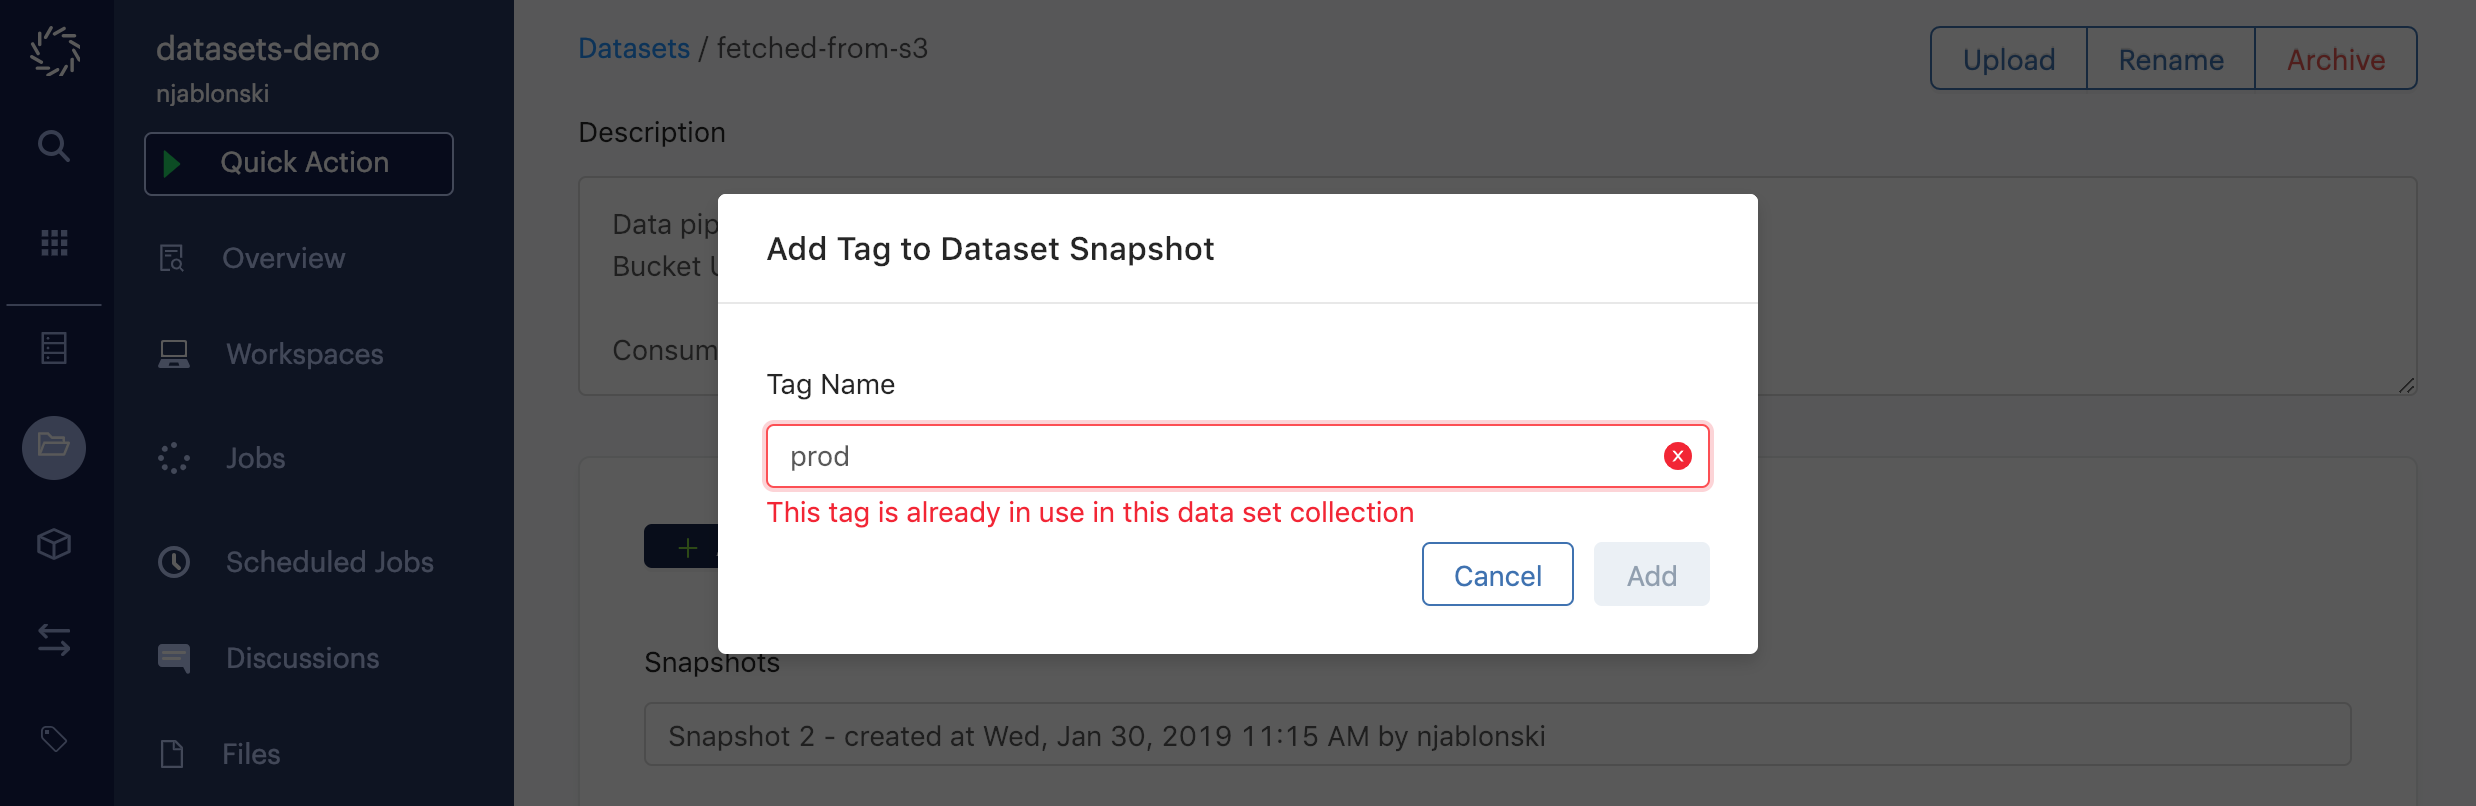
When you are confident that your experimentation has produced a new snapshot that is ready for production use, you can remove the prod tag from snapshot 1, and apply it to the new snapshot.
Your consumers automatically see the newly tagged snapshot mounted in their runs and workspaces.
Note that trying to apply the tag again without first removing it from the previously-tagged snapshot will result in an error.
Simplify working with Domino locally
If you use the Domino CLI to work with projects to your local machine, you may find that storing large data files slows down your download and sync operations, and fills up a lot of your local disk storage. You can prevent this by storing data in a Domino Dataset, and reserving your project files for the scripts and documents you want to work with locally.
Follow these steps to simplify your local workflow:
-
Create a Dataset in your project, and write your large data files to it.
-
Once the files have been written to the Dataset, you can remove them from your project files.
-
Update your code to reference your data files in their new location, at:
/domino/datasets/local/<dataset-name>/ -
When everything is working smoothly, you can delete any copies of the project from your local machine that have the large data files in them.
Automatically pipe data from external sources into Domino
If you have data in an external source that you want to periodically fetch and load into Domino, you can do so with scheduled jobs set up to write to Datasets with advanced mode.
Suppose you have data stored in an external data source that is periodically updated. If you wanted to fetch the latest state of that file once per week and load it into a Domino Dataset, you could use the following process to set up a scheduled run.
-
Create a Dataset to store the data from the external source.
-
Write a script that fetches the data and writes it to the Dataset.
-
Set up an advanced mode configuration to bridge between your script and your Dataset.
-
Create a scheduled job to run your script with the new Dataset configuration.
The following is a detailed example showing how to fetch a large, dynamic data file from a private S3 bucket with a scheduled Run once per week.
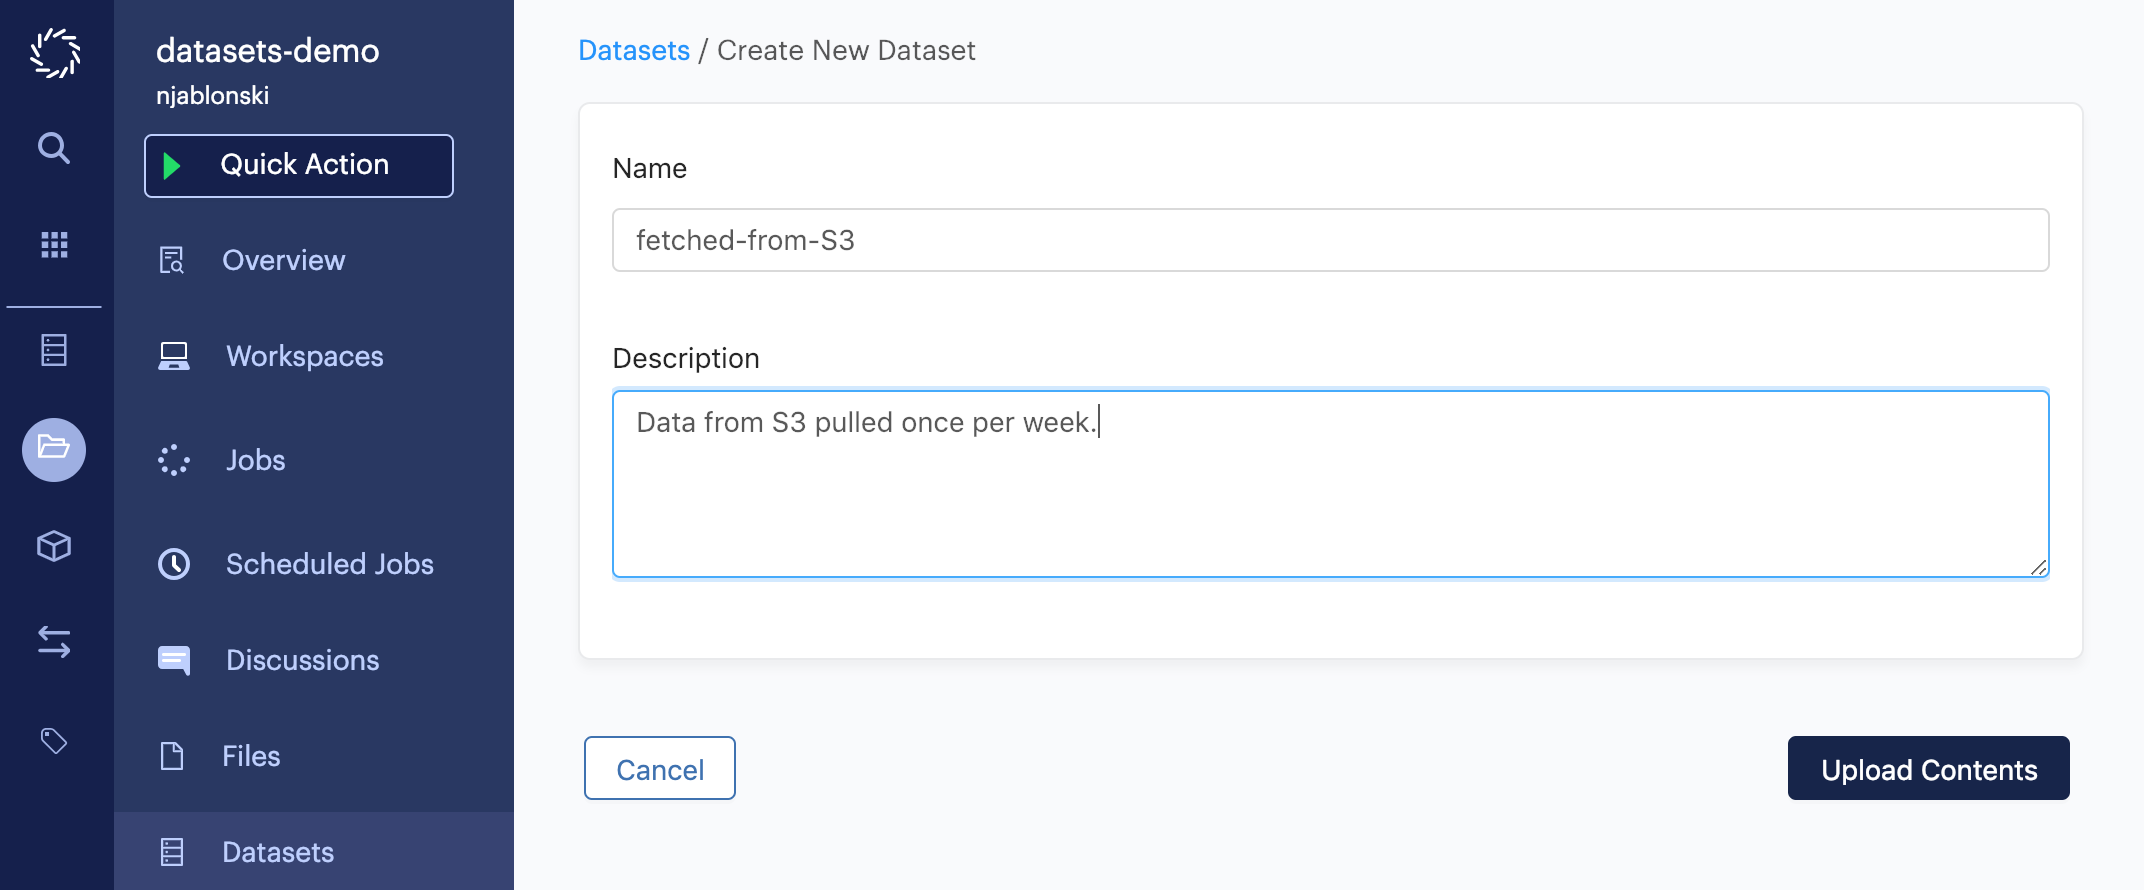
First, create a Dataset to hold the file. This example shows the Dataset being named fetched-from-S3.
After clicking Upload Contents, the Dataset will be created. However, instead of using one of the UI options to perform an upload, you should instead click files from the project menu, then click Add File to start creating the script for your scheduled Run.
For this example, assume the S3 bucket is named my_bucket and the file you want is named some_data.csv.
In that case, you can set up your script like this:
fetch-data.py
import boto3
import io

# create new S3 client
client = boto3.client('s3')

# download some_data.csv from my_bucket and write to latest-S3 output mount
file = client.download_file('my_bucket',
                            'some_data.csv',
                            '/domino/datasets/latest-S3/some_data.csv')
It’s important to note that the latest-S3 part of the path in the last line of the script is a folder you need to set up as part of your Datasets advanced mode configuration.
To set that up, create another new file in your project, and name it domino.yaml.
To match the script shown above, its contents should be the following:
domino.yaml
datasetConfigurations:
 - name: "pipe-in"
   outputs:
     - path: "latest-S3"
       dataset: "fetched-from-S3"
That configuration sets up the fetched-from-S3 Dataset created earlier for new input at the latest-S3 path used by the fetch-data.py script.
The last step is to set up a scheduled job that executes this script once per week with the correct Dataset configuration.