This topic shows you how to publish a Python app with Dash in Domino.
Use this tutorial to:
-
Configure a Domino environment with the necessary dependencies to publish a Dash App
-
Create a project and set it up for App publishing
-
Publish an App to the Domino launchpad
-
Observe how other users in Domino can use the App
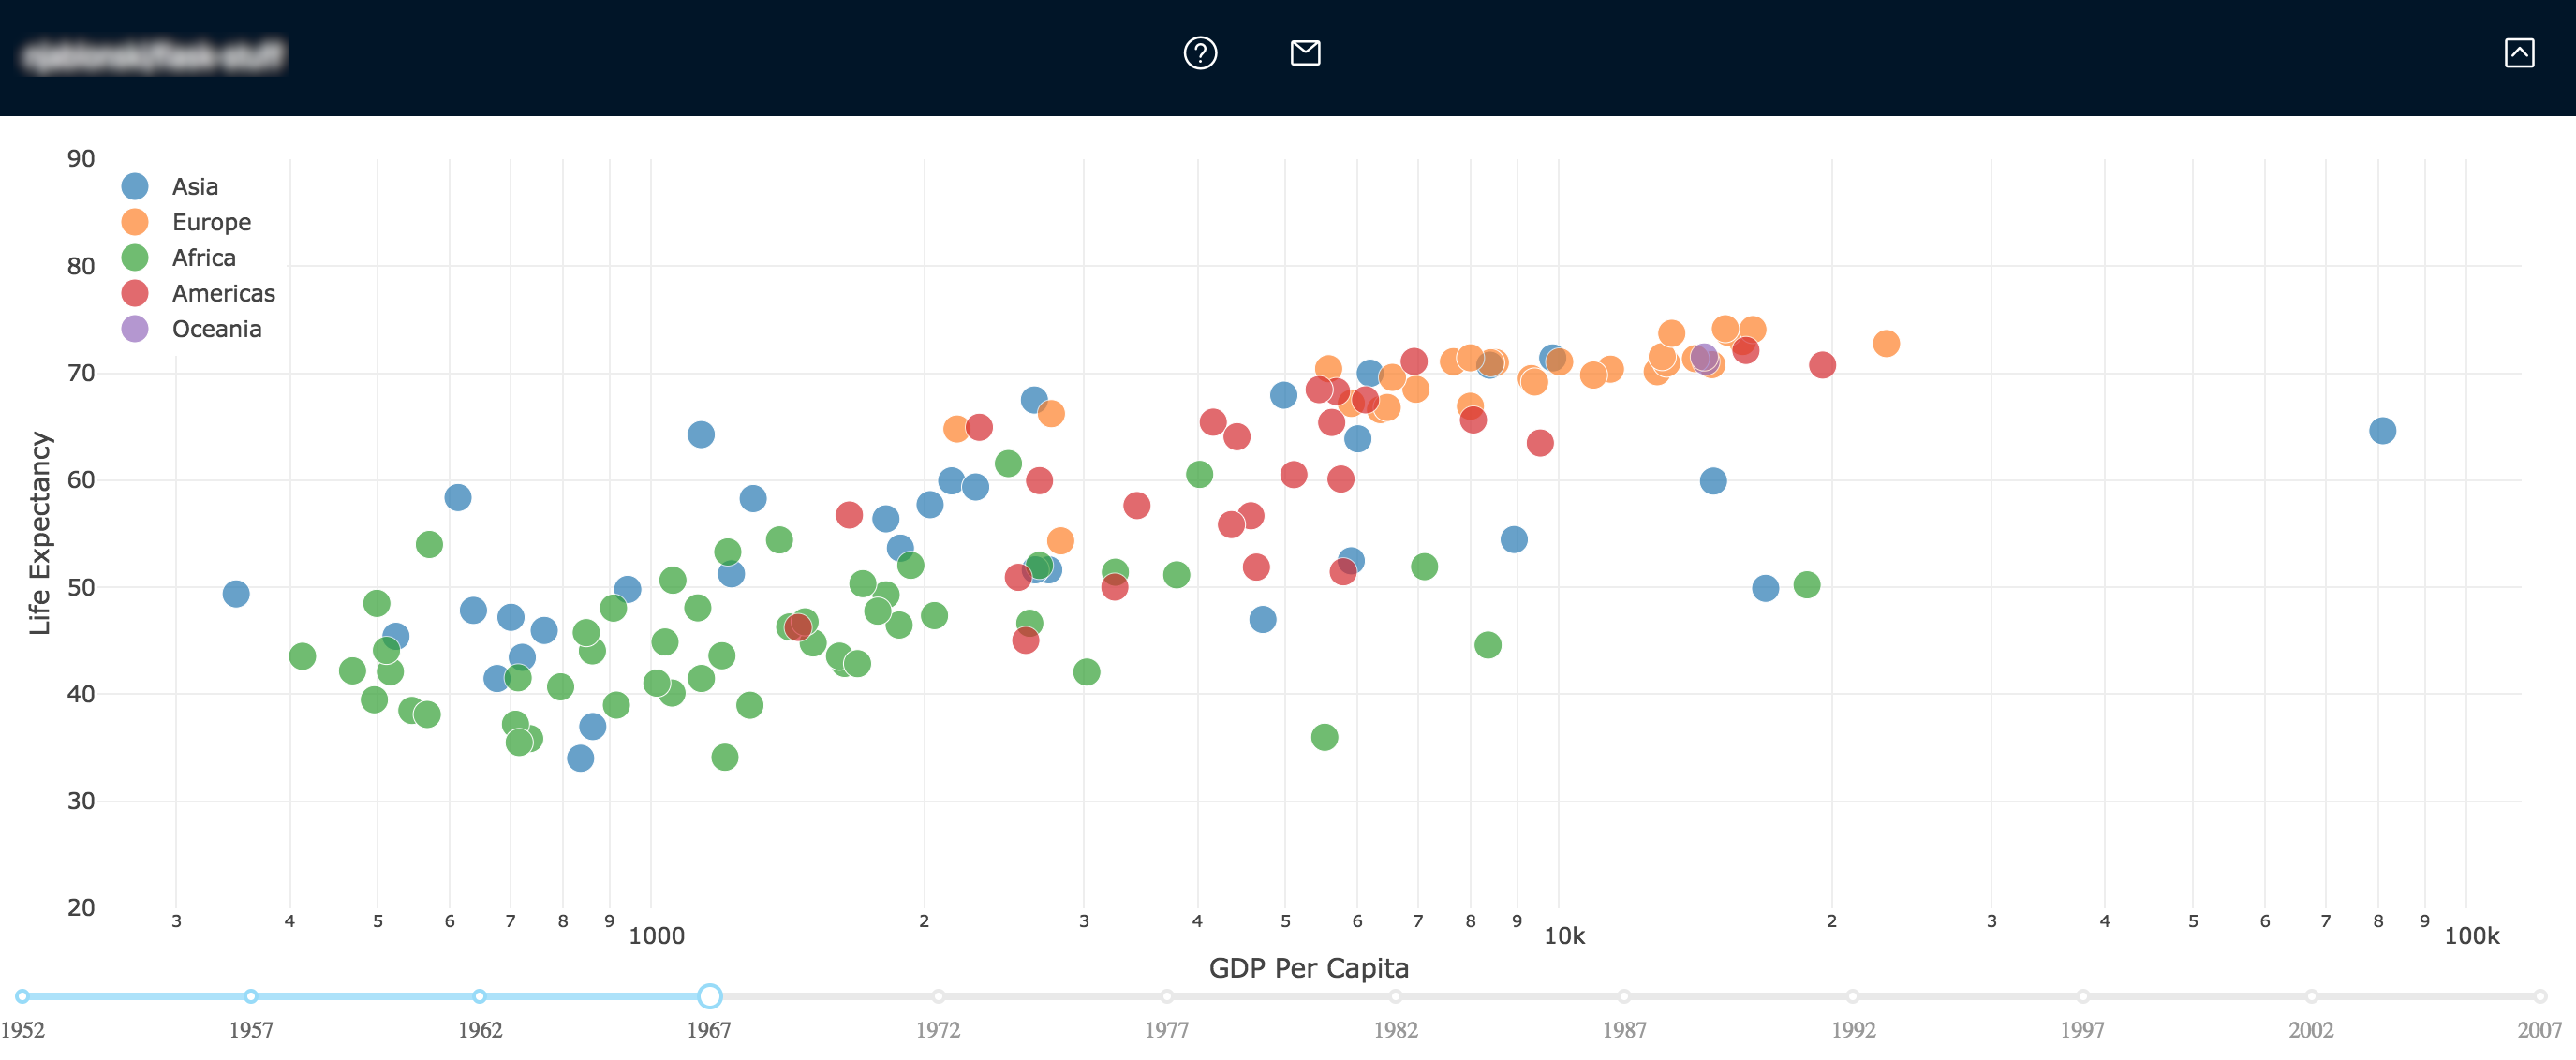
You’ll be working with the second example from Basic Dash Callbacks, part of the Dash User Guide. In this example, the application serves an interactive scatter plot of countries by Gross Domestic Product (GDP) per capita and life expectancy.
The first step is to create a Domino compute environment capable of running your App.
-
From the Lab, click Environments.
-
From the Environments Overview, click Create Environment.
-
Give your environment a descriptive name and description, and select Domino Analytics Distribution Py3.6 R3.4 from the Environment menu under Base Image. Selecting this applies the setup instructions for this environment on top of a base image with Python 3.6 and some analytics modules already installed. Read Domino standard environments to learn more about the contents of this base image.
-
Click Create Environment when finished.
-
The Overview tab for your new environment opens. Click Edit Dockerfile.
-
In Dockerfile Instructions, paste the following instructions:
 # Install the libraries we want to use in our app
 RUN pip install dash==0.22.0 && \
     pip install dash-renderer==0.13.0  && \
     pip install dash-html-components==0.11.0  && \
     pip install dash-core-components==0.26.0  && \
pip install plotly --upgrade-
Click Build.
The Revisions tab for your environment opens. You can monitor the build process for your new version of the environment. If the build succeeds, you’re ready to use this environment for App publishing.
The next step is creating a project with the settings and content you need to publish your App.
-
From the Lab, click Projects.
-
Click New Project.
-
Give your project an informative name, then click Create Project.
-
Click Settings in the project sidebar, then set the Compute environment to the one you created in the previous step.
-
Click Files in the project sidebar, then click Add File.
-
Name the file
app.pyin the title field preceding the editor. -
In the body of the file, paste the following example App code.
import dash
import dash_core_components as dcc
import dash_html_components as html
import pandas as pd
import plotly.graph_objs as go
import os

df = pd.read_csv(
    'https://raw.githubusercontent.com/plotly/'
    'datasets/master/gapminderDataFiveYear.csv')

app = dash.Dash()

# Configure Dash to recognize the URL of the container
user = os.environ.get("DOMINO_PROJECT_OWNER")
project = os.environ.get("DOMINO_PROJECT_NAME")
runid = os.environ.get("DOMINO_RUN_ID")
runurl = '/' + user + '/' + project + '/r/notebookSession/'+ runid + '/'

app.config.update({
'routes_pathname_prefix': runurl,
'requests_pathname_prefix': runurl
})

# Set layout
app.layout = html.Div(style={'paddingLeft': '40px', 'paddingRight': '40px'}, children=[
    dcc.Graph(id='graph-with-slider'),
    dcc.Slider(
        id='year-slider',
        min=df['year'].min(),
        max=df['year'].max(),
        value=df['year'].min(),
        step=None,
        marks={str(year): str(year) for year in df['year'].unique()}
    )
])


@app.callback(
    dash.dependencies.Output('graph-with-slider', 'figure'),
    [dash.dependencies.Input('year-slider', 'value')])
def update_figure(selected_year):
    filtered_df = df[df.year == selected_year]
    traces = []
    for i in filtered_df.continent.unique():
        df_by_continent = filtered_df[filtered_df['continent'] == i]
        traces.append(go.Scatter(
            x=df_by_continent['gdpPercap'],
            y=df_by_continent['lifeExp'],
            text=df_by_continent['country'],
            mode='markers',
            opacity=0.7,
            marker={
                'size': 15,
                'line': {'width': 0.5, 'color': 'white'}
            },
            name=i
        ))

    return {
        'data': traces,
        'layout': go.Layout(
            xaxis={'type': 'log', 'title': 'GDP Per Capita'},
            yaxis={'title': 'Life Expectancy', 'range': [20, 90]},
            margin={'l': 40, 'b': 40, 't': 10, 'r': 10},
            legend={'x': 0, 'y': 1},
            hovermode='closest'
        )
    }


if __name__ == '__main__':
    app.run_server(port=8888, host='0.0.0.0', debug=True)
Make note of the code block after app = dash.Dash(). When serving a Dash application from Domino, you must configure Dash to serve from a relative path instead of the default root path. This configuration is different in different Dash versions, but this code snippet has been tested for Dash versions 0.22 and higher. If you must support an older version of Dash, contact Domino support.
-
Make note of two important variables in the final line of the file. Domino-hosted applications must run on a host of
0.0.0.0and listen on port8888. These are the settings Domino expects when directing users to your App. -
Click Save when finished.
-
Create an
app.shfile. This is a Bash script that Domino runs after initializing the host serves your App. It must contain all commands required to launch your App. In this example, the only command you need ispython app.py. Create this file the same way you did forapp.py, then save it.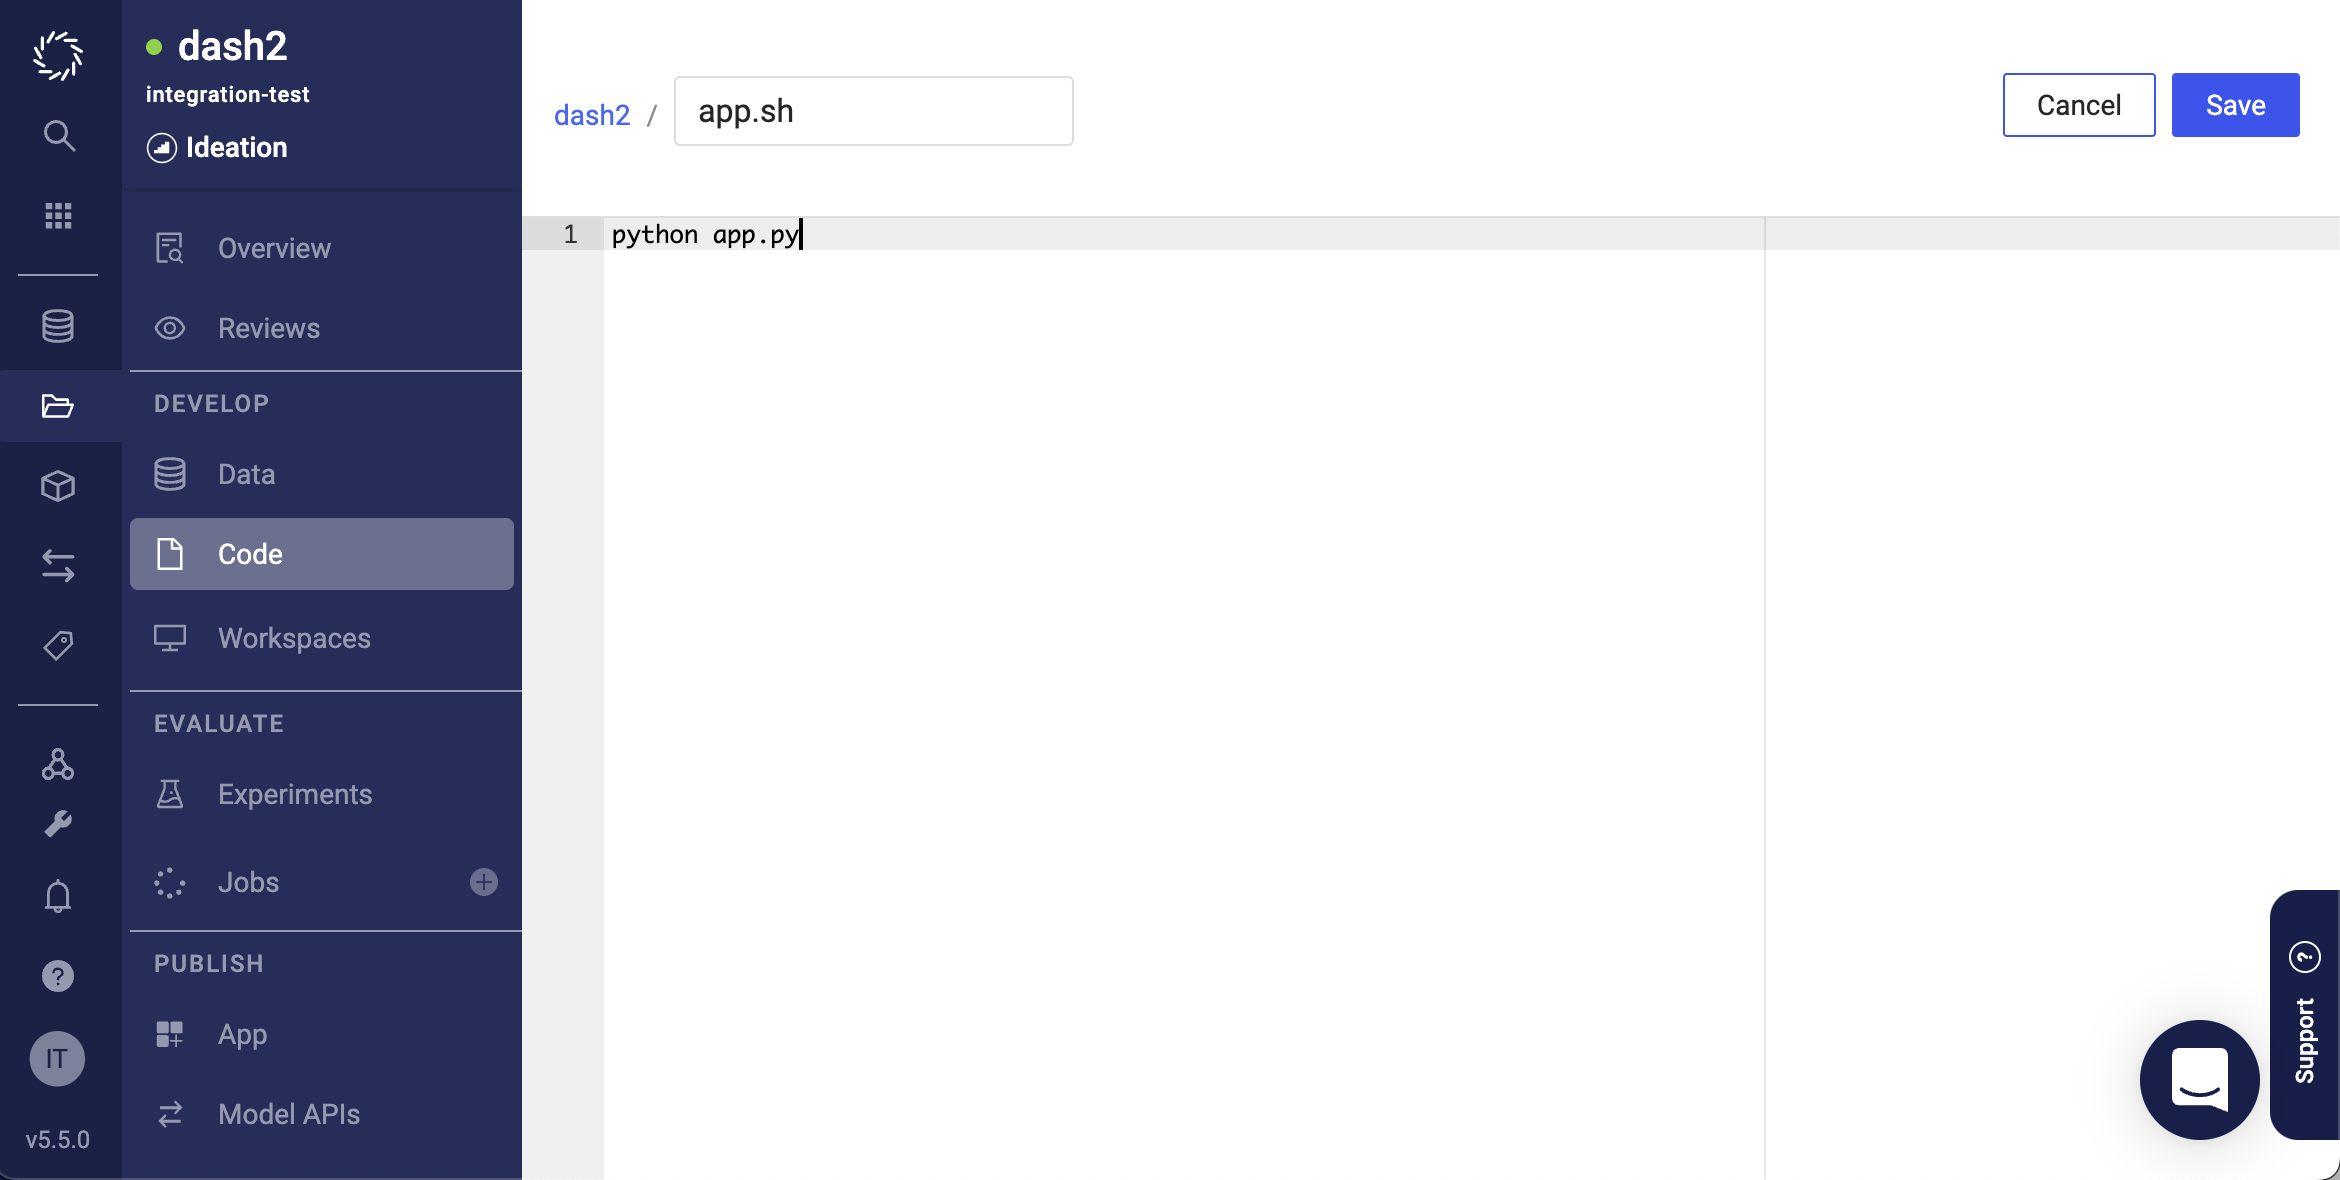
The app.sh file
When you publish an app, Domino looks for an app.sh file in your project to find the launch instructions. Aside from the app.sh file, Domino’s app development process mirrors standard development so your apps are portable and can be deployed elsewhere. Just include your app’s files in your Domino project.
When Domino launches your app, it runs the app.sh file within the container that contains your project files. The app.sh file must contain the command(s) to start the web hosting process.
|
Note
|
Domino requires this configuration for app service: 0.0.0.0 on port 8888.
If your hosting network uses a different default, specify that default in your app.sh file or some alternate configuration.
|
-
Click Publish from the project sidebar.
-
Give your App an informative title and description, and set Permissions to Anyone can access. This allows anyone with a network connection to your Domino deployment to access the App if they have the URL.
TipLeave Show in Launchpad selected to make your app easily discoverable. You can always change this later. 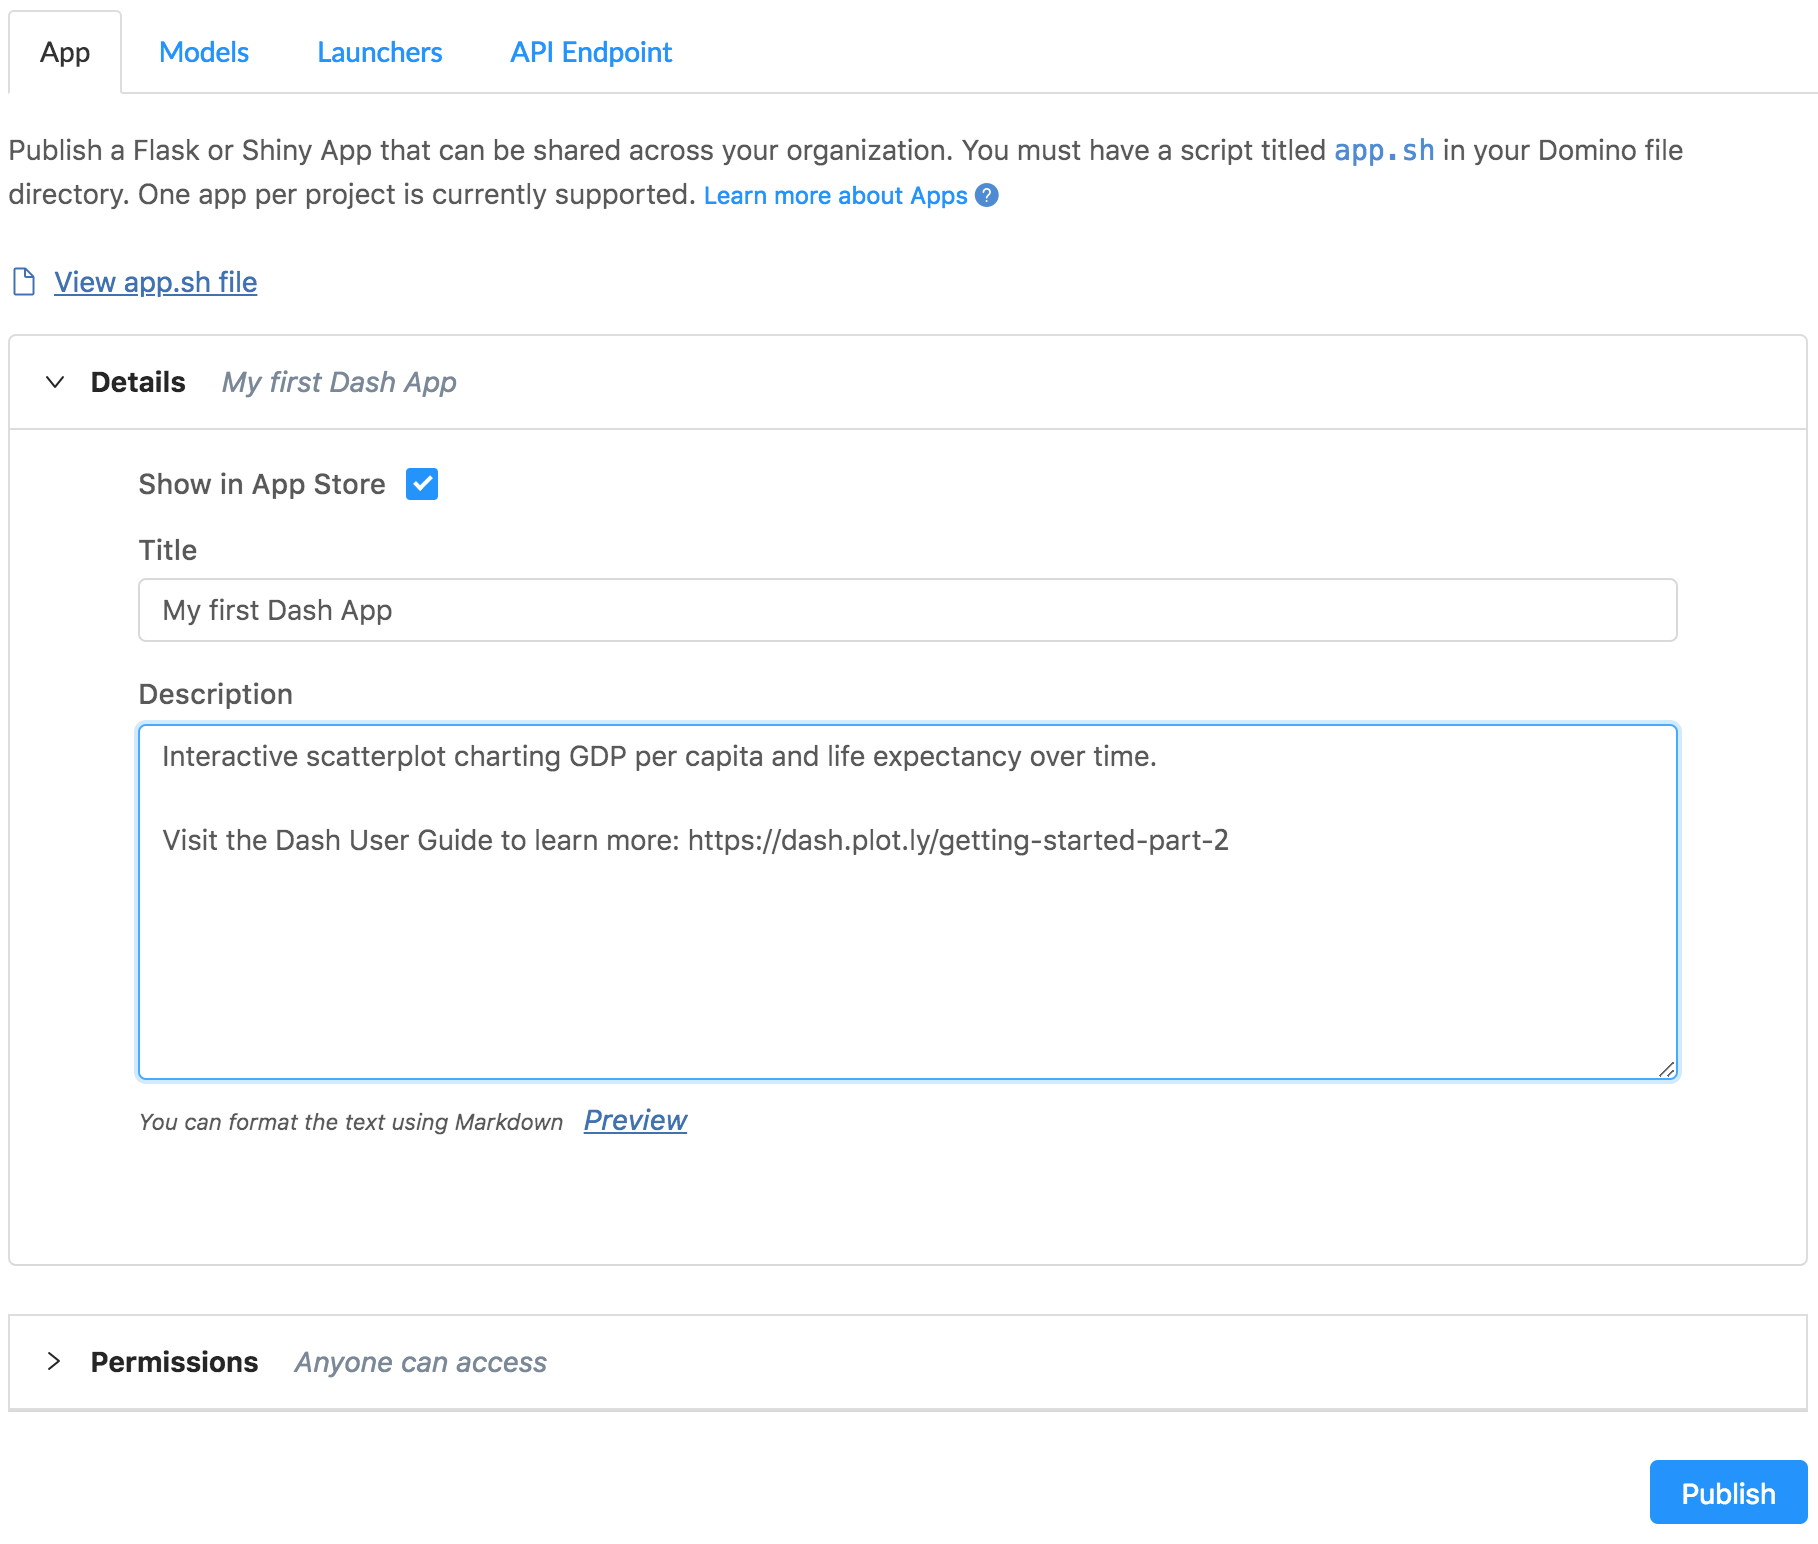
-
Click Publish.
-
After the App status says "Running", click View App to load your App. You should see the interactive scatter plot with a Domino toolbar preceding it showing the project it’s published from, plus buttons to email the App owner and open the description panel.
Now, you can set the permissions on your App to Anyone can access to share it with colleagues who have access to your instance of Domino. You can try this out yourself by opening a private or incognito browser, or logging out of Domino, and navigating to the App > Copy App Link.
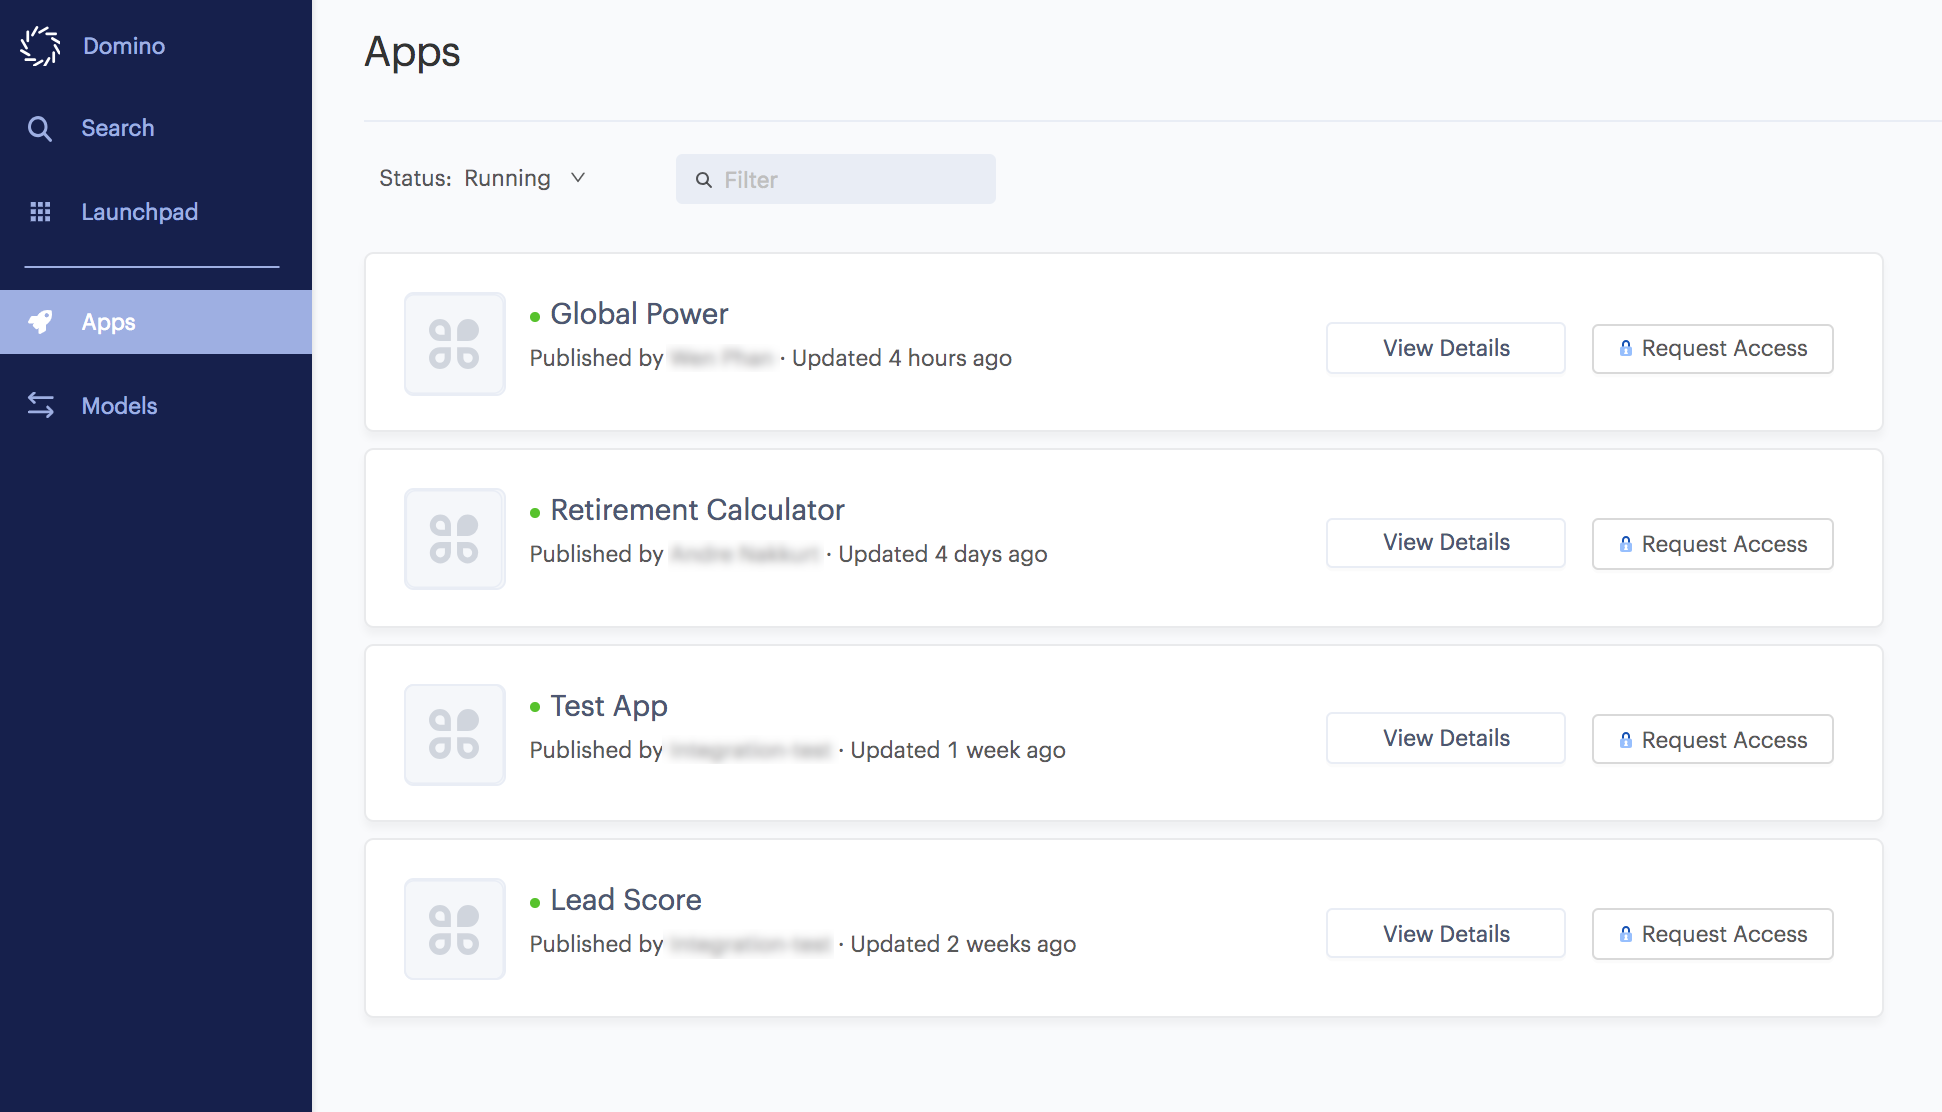
To browse more apps, go to the Launchpad in Domino UI. Here you can see all apps with Show in Launchpad enabled.